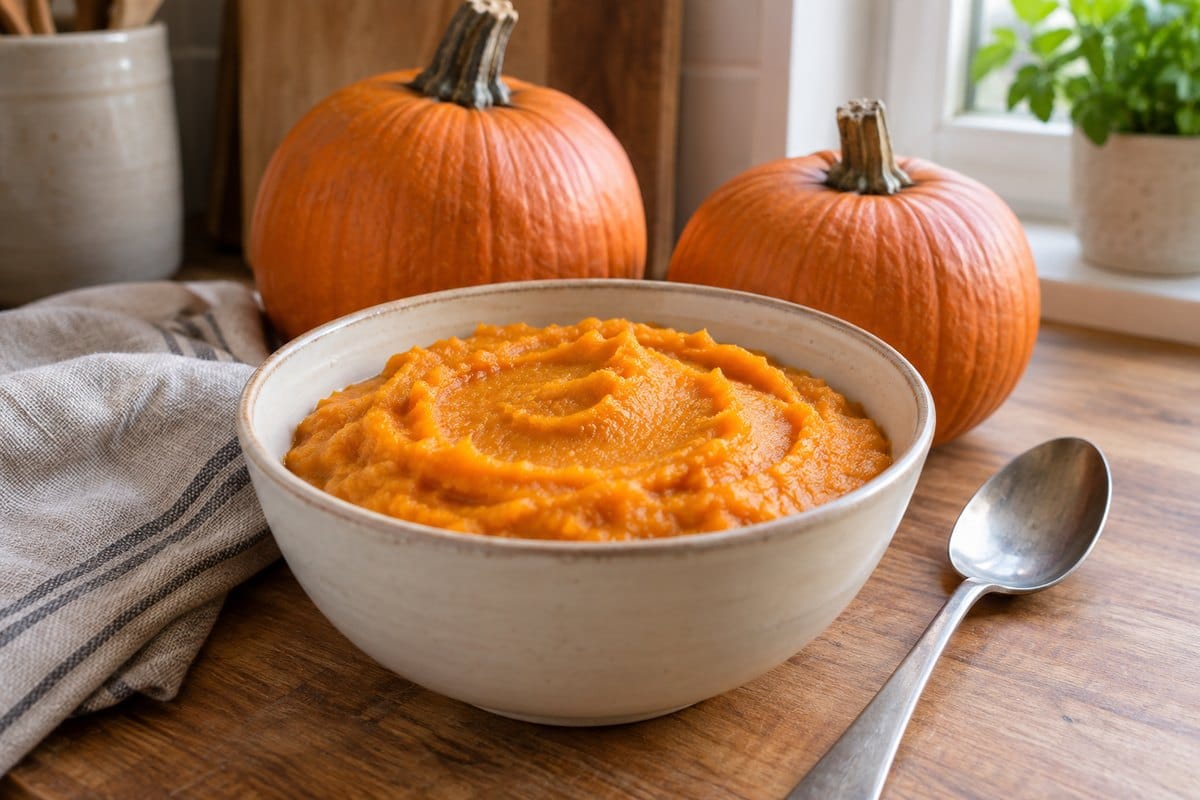
How to Make Pumpkin Puree and Freeze Useful Portions
A spoon slides through a baked pumpkin much more easily than a knife goes through the raw one. The flesh lifts away from the rind in soft orange pieces, and suddenly that pumpkin on the counter looks like the beginning of several meals.
Making pumpkin puree is straightforward. The details that make it useful later are getting the texture right, cooling it promptly, and freezing an amount your recipe actually needs instead of one large, unmarked block.
Table of Contents
How to Make Pumpkin Puree: The Quick Answer
- Choose: A sound cooking pumpkin, often labeled sugar or pie pumpkin.
- Bake: Halve and seed it, place cut-side down in a baking dish with 1 inch of water, and bake at 375°F for about 1 hour, until tender.
- Puree: Scoop the cooked flesh from the skin and mash or process until smooth.
- Cool and portion: Cool promptly, drain excess liquid if needed, then measure into useful amounts.
- Store: Refrigerate for 3–4 days or freeze. This is not a home-canning recipe.
The oven method below follows N.C. Cooperative Extension’s pumpkin preparation guide. Freezer preparation follows the National Center for Home Food Preservation.
Choose a Pumpkin for Cooking
Look for a sugar pumpkin, pie pumpkin, or another variety the grower recommends for cooking. Smaller cooking pumpkins generally have sweeter, less stringy flesh than large carving varieties. Nebraska Extension notes that an uncarved jack-o’-lantern variety can be eaten if it is in good condition, but its flesh is often more watery and fibrous.
For your first batch, choosing a cooking pumpkin removes one variable. Check the rind for damaged or soft areas and leave spoiled pumpkins out of the kitchen. Do not turn a carved, displayed jack-o’-lantern into puree.
You do not need to promise a certain number of cups before you begin. Pumpkin size, variety, and how much liquid you drain all affect the amount you have at the end. Measure the finished puree before deciding how many freezer packages to fill.
What You Need
- One sound cooking pumpkin and water for the baking dish
- A stable cutting board, sharp knife, and sturdy spoon
- A deep, oven-safe baking dish large enough for both halves
- A fork and a potato masher or food processor
- A clean shallow container for cooling
- Measuring cups or a kitchen scale, freezer bags or freezer-safe containers, and labels
- A fine-mesh sieve and bowl if the puree needs draining
Keep the batch plain. You can add salt, sugar, spices, or other recipe ingredients when you use it. That leaves the same pumpkin available for a savory soup or a sweet loaf instead of committing the whole batch to pie filling.
Bake the Pumpkin Until Tender
1. Wash, Cut, and Remove the Seeds
Wash your hands and clean the pumpkin’s outside before cutting; dirt on the rind can transfer to the flesh. Use a stable board and a clean, sharp knife. Illinois Extension’s pumpkin guide covers washing and cutting safety.
Cut the pumpkin in half and scoop out the seeds and stringy material. Work slowly, keeping your fingers away from the blade. Do not try to force a slipping knife through a hard stem.
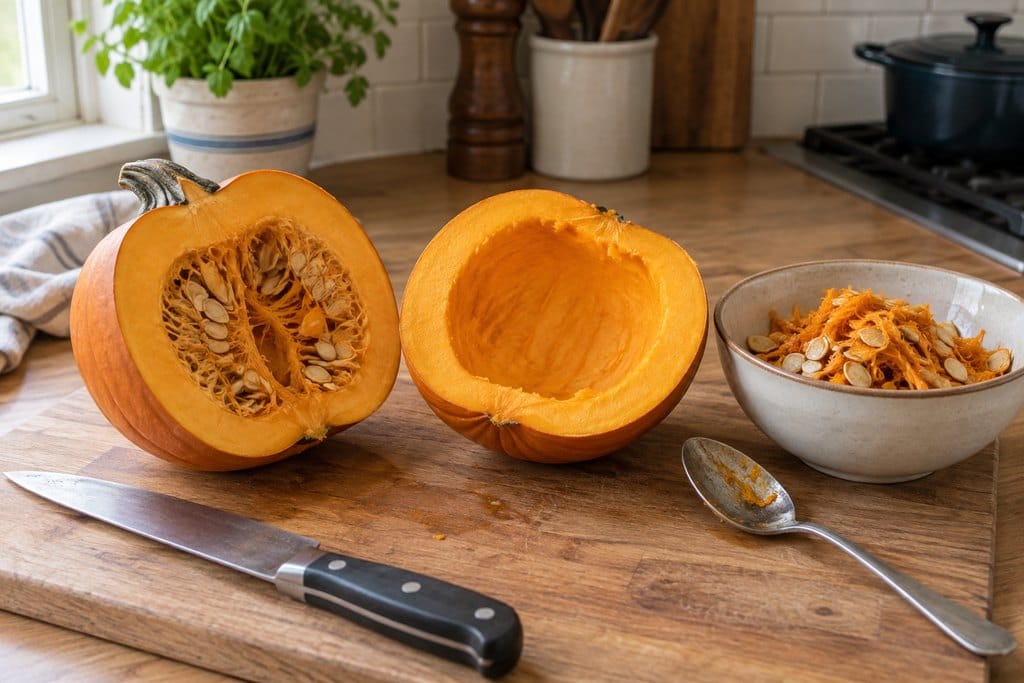
Put the seeds in a separate bowl if you want to keep them. Our guide to roasting pumpkin seeds so they turn crisp covers their preparation separately. They are not part of the puree.
2. Bake Cut-Side Down
Preheat the oven to 375°F. Place the prepared halves cut-side down in the baking dish and add water to a depth of 1 inch. Use a dish with enough depth to contain the water comfortably.
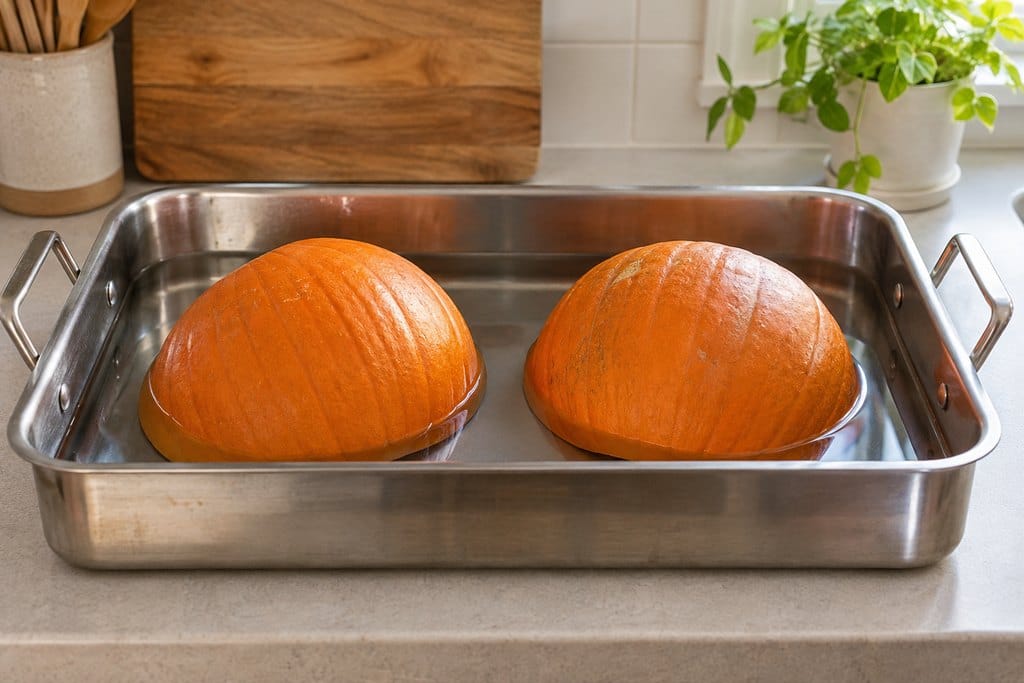
Bake for about 1 hour, or until tender, following the N.C. Extension method. Test the flesh with a fork; it should pierce easily. A thick pumpkin may need more time, so use tenderness as the endpoint rather than taking it out just because the timer rings.
Lift and move the hot dish carefully. There is hot water under the pumpkin, even if you cannot see much of it from above.
3. Scoop and Puree
Once the pumpkin is cool enough to handle safely, scoop out the soft flesh and discard the rind. Mash it by hand or process it into a smooth puree. Follow your appliance’s instructions for warm foods; do not seal hot pumpkin inside a blender that is not designed for it.
A masher is enough if a slightly rustic texture suits the dish. For a smooth filling, check for stray pieces of rind and persistent fibers before calling the batch finished. You are making a plain ingredient here, not a ready-to-bake pie filling.
Cool Promptly and Deal With Watery Puree
Do not leave a deep bowl of warm puree on the counter until it is completely cold. The NCHFP freezing method suggests placing the pan of pumpkin in cold water and stirring occasionally to help it cool. Keep that cooling water out of the food.
Divide a large batch into shallow containers and refrigerate promptly. USDA’s leftover-safety guidance sets a limit of 2 hours before refrigeration, or 1 hour when the surrounding temperature is above 90°F. Warm food can go into the refrigerator in small, shallow portions; it does not need to sit out first.
Drain Only If It Needs It
If the puree has a puddle of loose liquid or seems much thinner than the canned pumpkin your recipe expects, drain it before measuring. King Arthur Baking’s pumpkin guide uses a sieve over a bowl to remove excess liquid and thicken the puree.
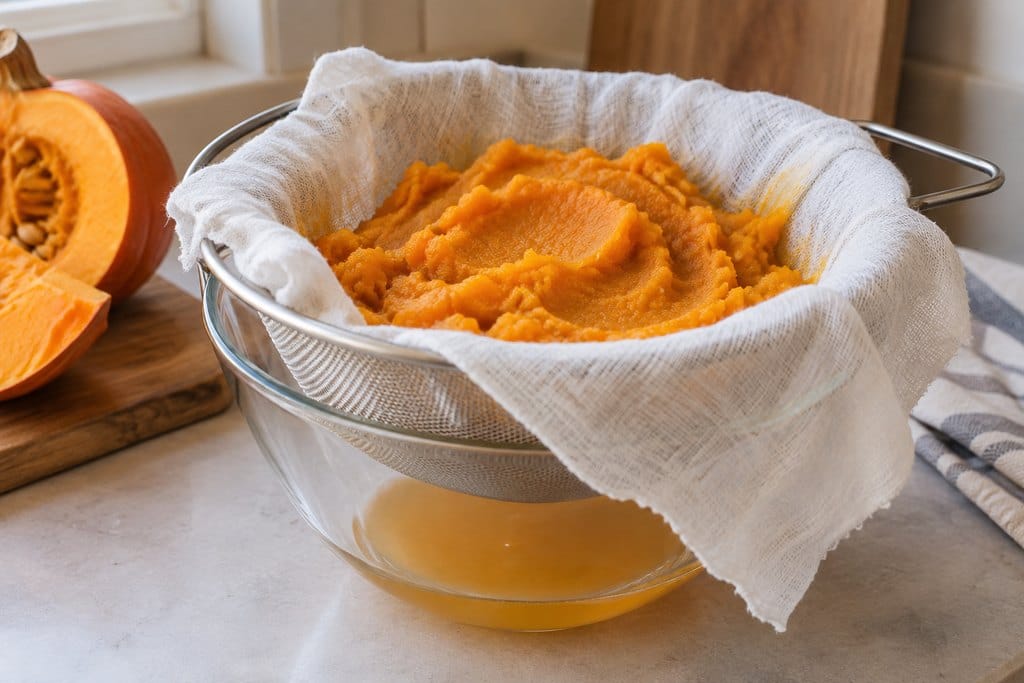
Set a fine-mesh sieve over a bowl, using clean cheesecloth if needed to hold the puree. Keep the cooling and food-safety rules above in mind: use chilled puree and let it drain in the refrigerator, not for hours on the counter. Cover the setup and keep the sieve above the collected liquid.
A thick, spoonable texture is a useful starting point for baking. There is no need to force every batch to release the same amount of water. If it is already thick, skip draining. Once you like the consistency, measure it for your recipe or freezer packages.
Freeze Portions You Will Actually Use
Before opening the freezer bags, look at the recipe you make most often. If it calls for a particular weight, weigh that amount. If it uses cups, measure cups. A label that says only “pumpkin” leaves the measuring job for another day.
| Portion Choice | When It Is Useful | Label Example |
|---|---|---|
| ½ cup | A smaller recipe or a top-up for another measured package | Plain pumpkin puree · ½ cup · date |
| 1 cup | A flexible basic portion you can combine with another | Plain pumpkin puree · 1 cup · date |
| Your recipe’s exact amount | A regular loaf, pie, or soup recipe | Plain pumpkin puree · actual weight or volume · date |
These are packaging suggestions, not fixed serving sizes. Nebraska Extension also recommends measuring cooled puree into 1-cup portions for freezing.
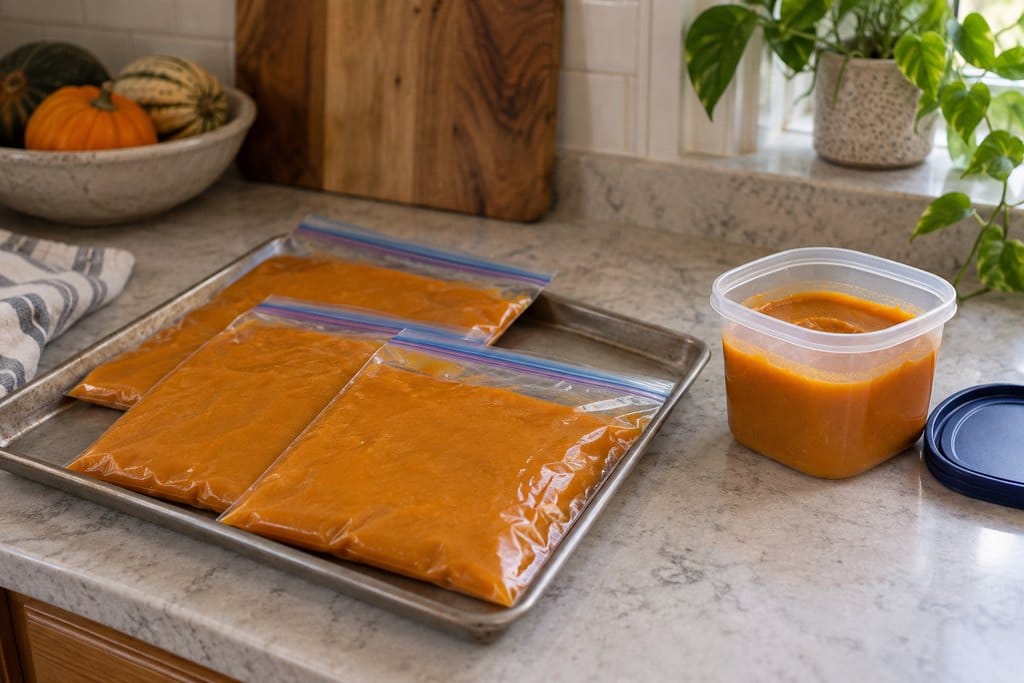
- Start with cooled puree. Portion it into freezer-safe bags or rigid containers.
- Leave expansion room. The NCHFP pumpkin instructions specify ½ inch of headspace. Do not fill rigid containers to the lid.
- Seal and label. Remove excess air from bags without squeezing puree into the closure. Include the contents, amount, and date.
- Freeze bags flat. Set them on a tray in a thin, even layer. Once solid, arrange the packages where you can read the labels.
The same “measure before freezing” habit is useful with shredded zucchini for baking. If you are filling the freezer with several crops, our peach-freezing guide covers fruit-specific preparation rather than applying this cooked-pumpkin method to everything.
Storage Times and Thawing
Keep the refrigerator at 40°F or below and the freezer at 0°F or below, as recommended in USDA’s food-safety basics.
- Refrigerator: Use fresh puree within 3–4 days, following Illinois Extension. Draining it overnight counts as part of that time.
- Freezer: Nebraska Extension gives up to 1 year for frozen puree. Treat this as a quality-planning window, not a reason to overlook poor packaging or a thawed freezer.
Thaw a package in the refrigerator, set in a bowl or on a tray to catch leaks. USDA identifies refrigerator thawing as a safe method. Avoid thawing puree on the kitchen counter.
Stir after thawing and check the texture before adding it to a recipe. If you drain away liquid, measure again afterward. For a baking project, move the package to the refrigerator ahead of time so a frozen center does not hold up the rest of the recipe.
Do Not Home-Can Pumpkin Puree
Neither water-bath canning nor pressure canning is recommended for homemade pumpkin puree. Illinois Extension explains that USDA withdrew its instructions for canning mashed or pureed pumpkin in 1989, because the thickness of puree varies too much from batch to batch to set one safe process. The NCHFP warning about pumpkin butter describes the same problem: batches differ in thickness and acidity, so no safe processing time can be verified.
Pressure-canning instructions for pumpkin cubes do not apply to mashed pumpkin. Use refrigeration or freezing for this batch. Our overview of food-preservation methods can help you choose an appropriate method for other harvest foods without assuming every cooked food belongs in a pantry jar.
Common Questions About Homemade Pumpkin Puree
Do You Peel the Pumpkin Before Baking?
Not for this method. Bake the prepared halves with the rind on, then scoop out the tender flesh. That avoids trying to peel the entire hard pumpkin before cooking.
Can You Use It Instead of Canned Pumpkin?
Yes. Nebraska Extension recommends substituting the same amount for canned pumpkin. Check the texture first, and follow the recipe’s stated weight or volume. Plain pumpkin puree is different from sweetened, seasoned pumpkin pie filling.
Do You Need a Food Processor?
No. Cook the flesh until tender and use a masher. A processor is convenient when you want a finer texture, but it is not a requirement for a useful batch.
Why Is Homemade Puree a Different Color?
Homemade puree does not always match the deep orange of canned pumpkin. King Arthur’s baking comparison shows a more golden homemade puree. Color alone is not a reason to add spices or keep cooking it.
Start with one pumpkin and package it for a recipe you already enjoy. A flat bag with the right amount written on it is a small piece of preparation that makes the next baking day easier.