How to Build a Chicken Coop (Weekend Build Guide)
Building a chicken coop is straightforward carpentry. Four walls, a floor, a roof, a door. Most beginners with a weekend and a circular saw can finish a small coop in two to three days. What trips people up is not the building itself. It is not knowing the non-negotiables before they start: the space requirements, the ventilation math, the hardware choices that determine whether a flock survives its first encounter with a raccoon.
This guide walks through every stage on How to Build a Chicken Coop : pre-build decisions, a realistic materials budget, a step-by-step build sequence, the interior setup hens actually need, and the five mistakes that send beginners back to the lumber yard a second time.
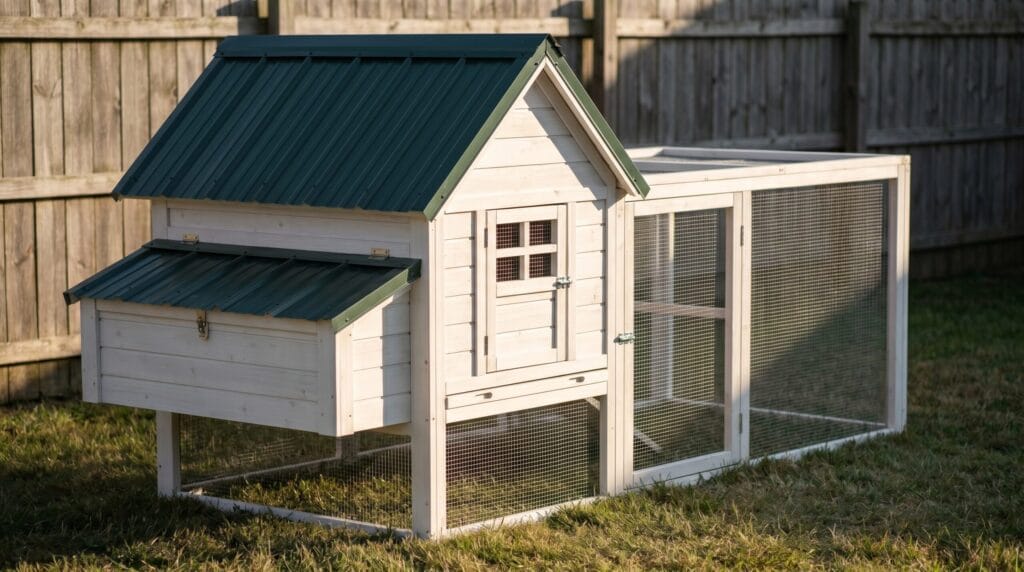
To build a chicken coop, frame a floor and four walls using pressure-treated lumber, sheathe the exterior with plywood, install a ventilated roof, add a hardware-cloth-covered run, and finish the interior with roosting bars and at least one nesting box per four hens. Plan for 4 square feet of indoor space and 10 square feet of run space per bird.
Table of Contents
Quick Answer
- Flock size drives coop size. A 4×8 coop (32 sq ft) comfortably fits 8 standard hens. Twelve birds need at least 48 sq ft of interior space.
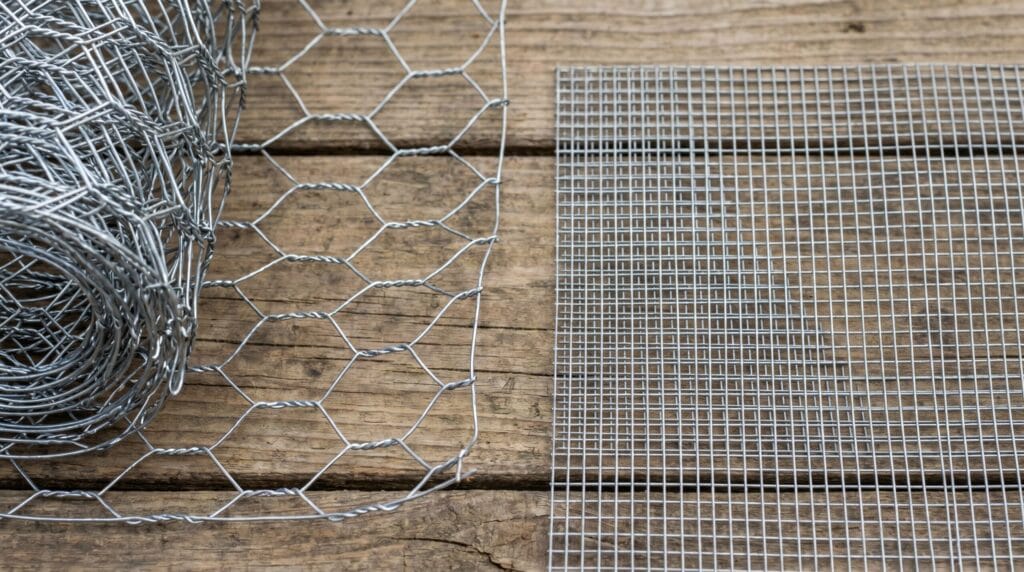
- Use hardware cloth, not chicken wire. Raccoons tear through chicken wire. Half-inch welded hardware cloth is the only reliable predator barrier.
- Budget roughly $250 to $450 for a basic DIY 4×8 coop with a small attached run, depending on local lumber prices in 2026.
- A first-time builder with a helper can finish in 12 to 18 hours across two or three days.
- Ventilation is not optional. Ammonia from droppings causes respiratory disease faster than cold weather does.
- Roosts must sit higher than nesting boxes. If they are at the same height, hens sleep in the boxes and foul the eggs every night.
- Check zoning before you buy a single board. Some municipalities cap flock size or ban roosters outright.
What to Decide Before You Build Anything

Every coop problem that shows up in month three was a decision problem in week one. Getting these four questions settled before you buy lumber saves real money.
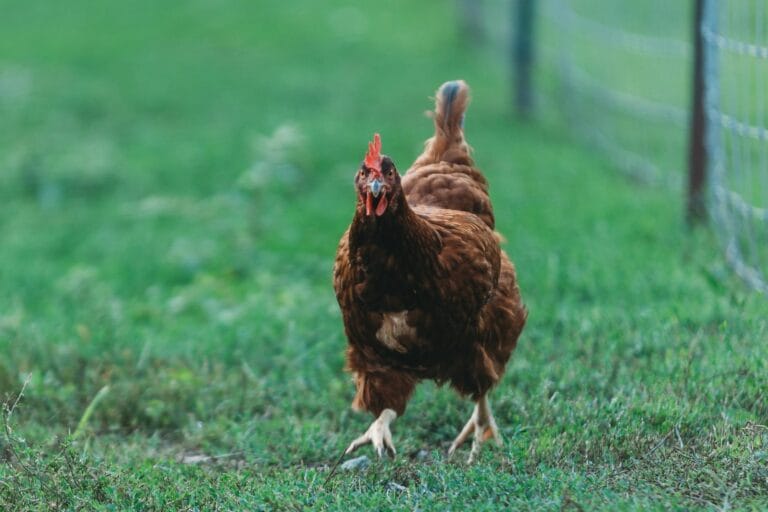
How Many Birds, and What Size?
The baseline most land-grant extension services use is 4 square feet of indoor space and 10 square feet of run space per standard-size hen as the minimum for healthy flock management. Bantam breeds need a little less; larger breeds like Jersey Giants or Brahmas need more. A 4×8 coop, the most common beginner footprint, gives you 32 square feet of interior, which means 8 standard birds comfortably. Not 12. Not 15. Eight.
If you are still figuring out which breed you plan to keep, settle that first. Breed size affects both coop footprint and how many eggs to expect, which affects how many birds you actually need.
Local Rules and Zoning
Some municipalities ban roosters by ordinance. Others cap flocks at four or six hens. A few HOAs prohibit poultry entirely. A five-minute check with your county zoning office or a quick read of your HOA rules costs nothing. Building a coop and then being forced to rehome your birds costs considerably more than that.
Placement and Orientation
Face the pop door (the small chicken-sized entrance) south or southeast. This maximizes winter sunlight exposure inside the coop during the shortest days of the year and keeps the prevailing cold wind from blowing directly through the opening. Avoid low spots in the yard where water pools. Muddy runs breed disease and make daily chores miserable.
Stationary or Moveable?
A stationary coop stays in one place and typically has a permanent attached run. A chicken tractor is a smaller, lighter, bottomless coop you move across the yard so birds get fresh ground regularly. The builds are meaningfully different. A tractor needs lighter framing and handles; a stationary coop needs deeper predator protection on the run perimeter. Decide now, because the materials list changes depending on your answer.
Materials List and What It Will Actually Cost
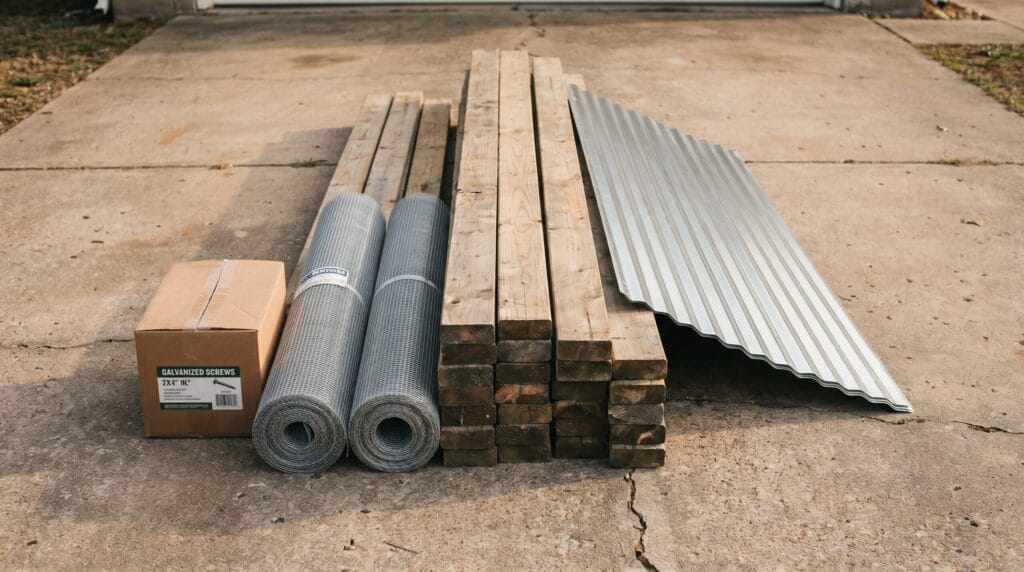
Most beginner guides dodge the cost question. Here is an honest breakdown for a basic 4×8 coop with a 4×8 attached run, using 2026 lumber prices as a baseline. Prices vary by region and season, so treat these as estimates.
| Material | What It Does | Estimated Cost |
|---|---|---|
| Pressure-treated 2x4s (floor frame) | Resists ground moisture and rot | $30 to $50 |
| Standard 2×4 studs (walls, roof frame) | Structural framing | $50 to $90 |
| 3/4-inch plywood (floor) | Solid, easy-to-clean floor surface | $25 to $40 |
| 1/2-inch plywood (wall sheathing) | Exterior wall panels | $35 to $60 |
| 1/2-inch hardware cloth (run and vents) | Predator-proof mesh | $40 to $80 |
| Metal roofing panels or asphalt shingles | Weatherproofing the roof | $30 to $70 |
| Hinges, latches, screws, staples | Assembly and security hardware | $40 to $60 |
| Concrete blocks or gravel (foundation) | Keeps wood off damp ground | $10 to $20 |
Total DIY estimate: roughly $260 to $470 for materials alone. Labor is your weekend.
Kit coops from farm supply stores retail for roughly $300 to $700 in 2026, but most are sized for fewer birds than the packaging implies. In many cases, a kit labeled “for 6 chickens” has only 12 to 16 square feet of interior space, which realistically fits 3 or 4 standard hens.
A Note on Pallets
Pallets are a legitimate cost-cutter for wall sheathing, but they require inspection. Look for the HT stamp, which means heat-treated. Avoid any pallet stamped MB, which indicates methyl bromide treatment, a pesticide that is not safe for animals or soil. Also check for gaps wider than 1 inch, predators can reach through them. Pallets add work, but they can reduce your material cost by roughly $40 to $80 on a small build, though that depends on how many pallets you can source for free.
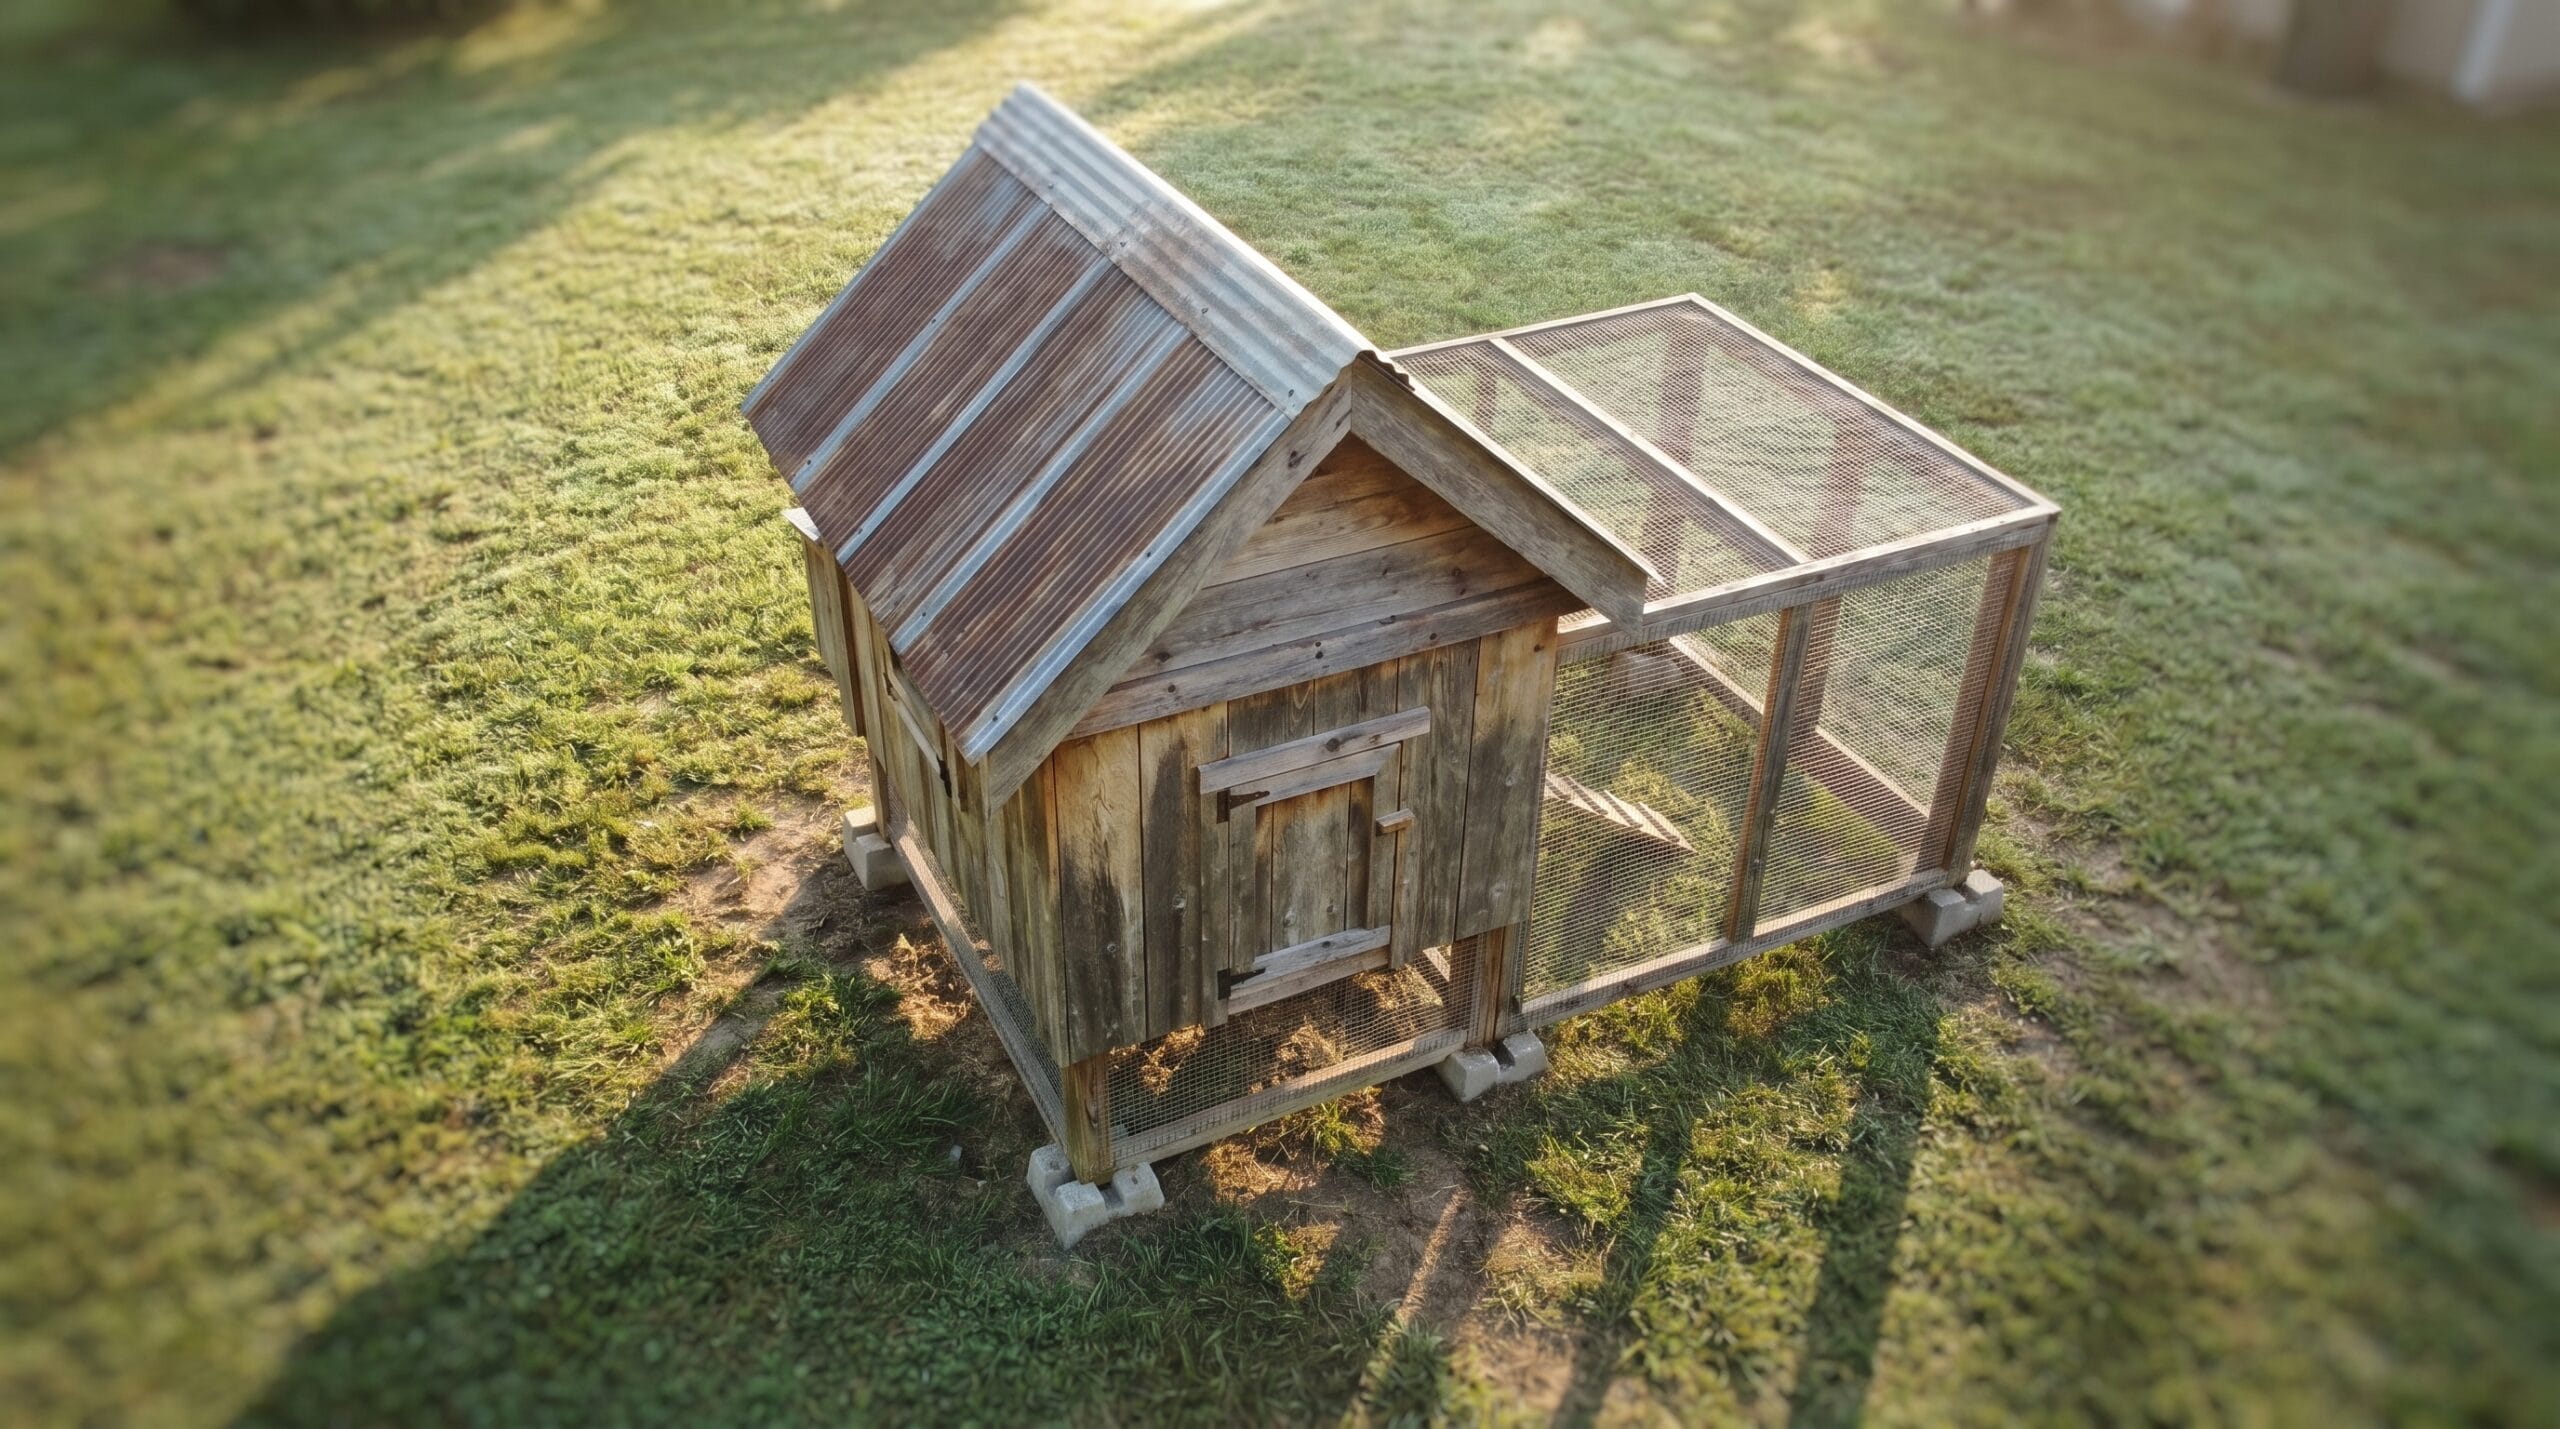
Step-by-Step Build: Foundation Through Roof
This sequence assumes a simple 4×8 stationary coop with a shed (single-pitch) roof. Adjust dimensions as needed, but keep the order of operations the same.
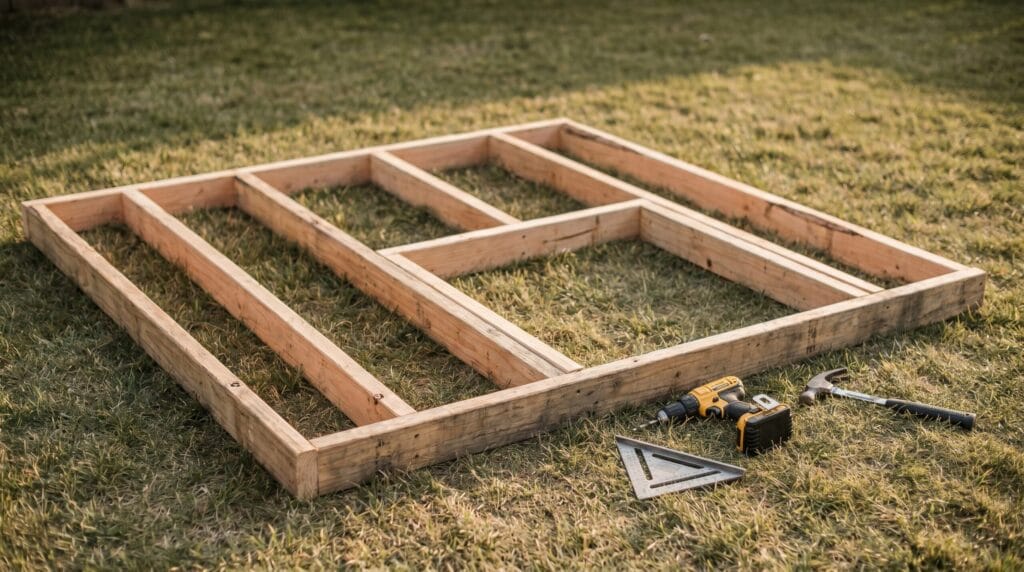
Step 1: Build the Floor Frame
Cut pressure-treated 2x4s into a rectangular frame matching your planned footprint. Add interior joists every 16 inches for support. Set the completed frame on concrete blocks or a gravel bed, this lifts the wood off damp ground and is the single most effective thing you can do to prevent rot and deter rodents from nesting underneath.
Step 2: Frame the Walls
Frame all four walls flat on the ground before standing them up. Use standard 2×4 studs on 16-inch centers. Check with your local building department before starting, some jurisdictions require permits for permanent outbuildings, and stud spacing requirements can vary. Frame in your window, pop door, and human-access door openings at this stage. A 24×24-inch window on the south wall is a common starting point. Leave a 1-inch gap at the top of each wall, this becomes part of your passive ventilation gap once the walls are standing.
Step 3: Stand the Walls and Sheathe the Exterior
Stand each wall, brace it temporarily, and fasten wall corners together. Once the box is square and plumb, attach 1/2-inch plywood to the exterior. Do not seal every gap, intentional ventilation openings matter more than a perfectly airtight envelope.
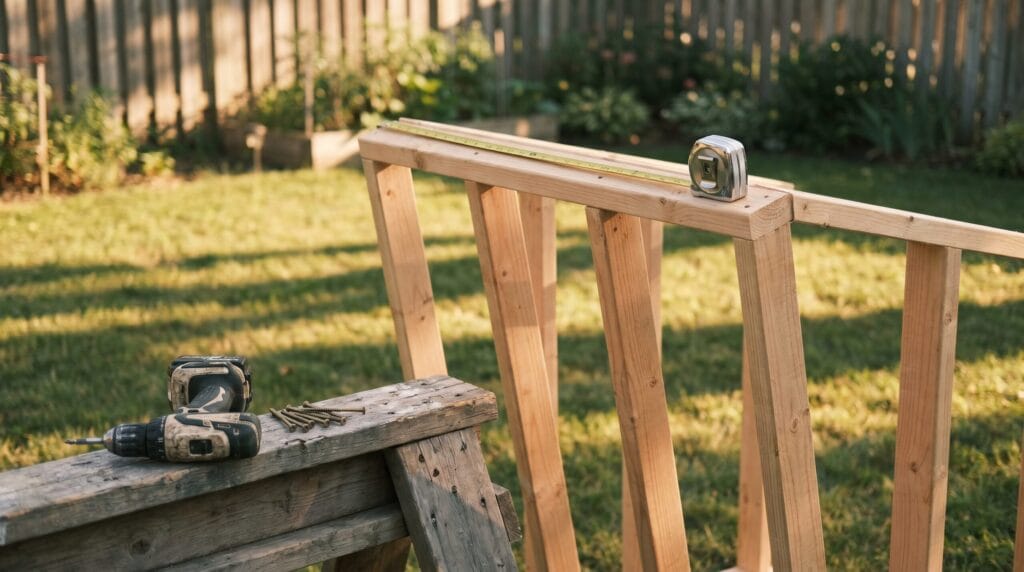
Step 4: Install Roosting Bars
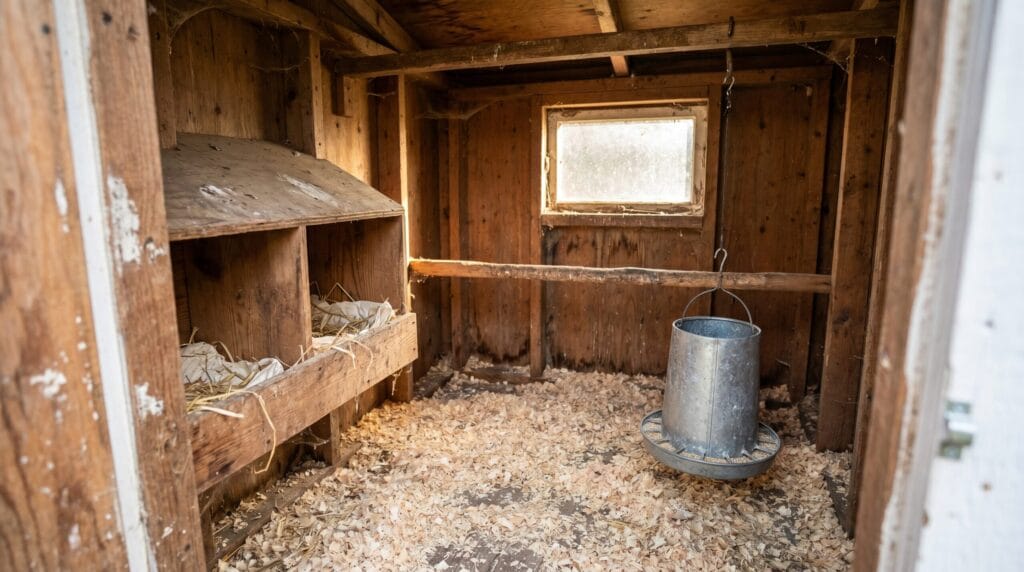
Two-by-fours laid flat (wide side up) make ideal roosts. The flat surface lets birds grip without straining their feet. Install them 18 to 24 inches off the floor with 8 to 10 inches of bar space per bird, positioned away from drafts. These must sit higher than the nesting boxes, hens always choose the highest available spot to sleep.
Step 5: Build and Mount Nesting Boxes
One box per 3 to 4 hens. Each box should be at least 12×12 inches, though 14×14 is more comfortable for larger breeds. Mount boxes 12 to 18 inches off the floor, below roost height. Line the interior with 2 to 3 inches of pine shavings or straw. A small lip at the front keeps bedding from spilling out.
Step 6: Frame and Roof
A shed roof (single pitch sloping from front to back) is the simplest option for a first build. Frame it with 2×4 rafters, sheathe with plywood, then install metal roofing panels or asphalt shingles. Overhang the roof a few inches on all sides to keep rain from running directly down the walls.
Step 7: Hang the Doors and Hardware
The pop door should be large enough for your hens to pass through easily, 10×12 inches works for standard breeds. The human-access door needs to be large enough that you can comfortably reach every corner of the interior for cleaning. Use heavy-duty galvanized hinges on both. Add predator-proof sliding bolt latches or carabiner-style closures. Raccoons can open simple hook-and-eye latches.
Step 8: Build and Attach the Run
Frame the run with 2×4 or 4×4 posts. Cover all six sides (four walls, roof, and floor apron) with half-inch welded hardware cloth rather than chicken wire, stapled and secured with hardware-cloth staples and washers. Bury or bend outward at least a 12-inch L-shaped apron of welded wire mesh at the base of the run perimeter, and extend it to 18 to 24 inches in areas with heavy fox or coyote pressure. This skirt stops digging predators, foxes, dogs, and raccoons, from tunneling under the edge.
The 5 Most Common Beginner Coop Mistakes
Naming the failure modes early is more useful than pretending the build is foolproof. These five errors account for most of the “I have to rebuild this” conversations in backyard chicken forums.
Mistake 1: Using Chicken Wire Instead of Hardware Cloth
Chicken wire keeps chickens in. It does not keep predators out. As extension services consistently note, a determined raccoon can tear through standard chicken wire, which is not rated as a predator barrier. Half-inch welded wire mesh is the only material worth using for run walls, vent covers, and any gap larger than a quarter inch. The cost difference is real but not large enough to justify the risk.
Mistake 2: Insufficient Ventilation
The minimum guideline most extension services cite is approximately 1 square foot of ventilation opening per 10 square feet of coop floor space to prevent ammonia buildup from droppings. In practice, more is usually better. Cold air is a far smaller threat to chickens than respiratory disease from ammonia. A coop can be well-ventilated and still retain warmth if the vents are positioned at the top of the wall (above roost height) and not blowing directly onto sleeping birds.
Mistake 3: Building Too Small
The most common error beginners make is building for the flock they have today rather than the flock they will have in a year. Cramped birds become stressed. Stressed birds pick at each other, disrupt the pecking order, and stop laying. If you are on the fence between sizes, go bigger.
Mistake 4: No Predator Apron on the Run
A run with hardware-cloth walls but an unprotected perimeter at ground level is still vulnerable. Foxes and dogs will dig at the base until they get through. The hardware-cloth apron, bent outward at 90 degrees and laid flat on the ground, then covered with soil or rocks, closes that gap for good. It takes an extra hour to install.
Mistake 5: Roosts and Nesting Boxes at the Same Height
If nesting boxes are mounted as high as the roosting bars, hens will sleep in the boxes. Every night. The result is droppings-fouled bedding in the boxes and eggs that are difficult to clean. Roosts must be the highest surface in the coop, always.
How Long It Takes to Build: A Realistic Weekend Timeline
No top-10 guide will tell you this clearly, so here it is: a first-time builder with basic carpentry skills and a helper should expect 12 to 18 total hours across two to three days for a 4×8 coop with a small run. Working alone and learning as you go can add 30 to 50 percent or more to that estimate, depending on your familiarity with basic carpentry.
Day 1 (4 to 6 hours): Cut all lumber to length, build the floor frame, and frame all four walls flat on the ground. Having everything framed before you stand a single wall up is faster than building vertically from the start.
Day 2 (4 to 6 hours): Stand and brace the walls, sheathe the exterior with plywood, and frame the roof. By the end of day two, your coop should be weatherproof enough to sit overnight without stress.
Day 3 (3 to 5 hours): Install roofing, hang both doors, attach hardware cloth to vents and windows, and build the run. This is also when you install roosting bars and nesting boxes.
Kit coops skip the framing stage entirely, which is their main advantage. A kit still requires 4 to 8 hours of assembly, and the quality of the hardware (latches, hinges, mesh gauge) varies significantly by brand.
What Goes Inside: The Non-Negotiable Interior List
The structure keeps predators out and weather at bay. What goes inside determines whether the birds are actually healthy, productive, and easy to manage.
Roosting Bars
Eight to 10 inches of bar per bird, positioned 18 to 24 inches off the floor. Flat 2x4s work better than round dowels because chickens can sit flat-footed without gripping, which reduces foot problems over time. Keep roosts away from exterior walls in cold climates to minimize drafts on sleeping birds.
Nesting Boxes
One box per 3 to 4 hens, 12×12 inches minimum. Hens are not shy about sharing, but if there are too few boxes, subordinate birds in the pecking order get crowded out and may lay on the floor. Line each box with dry bedding, pine shavings, straw, or hemp are all commonly used. Replace bedding when it gets damp.
Feeder and Waterer
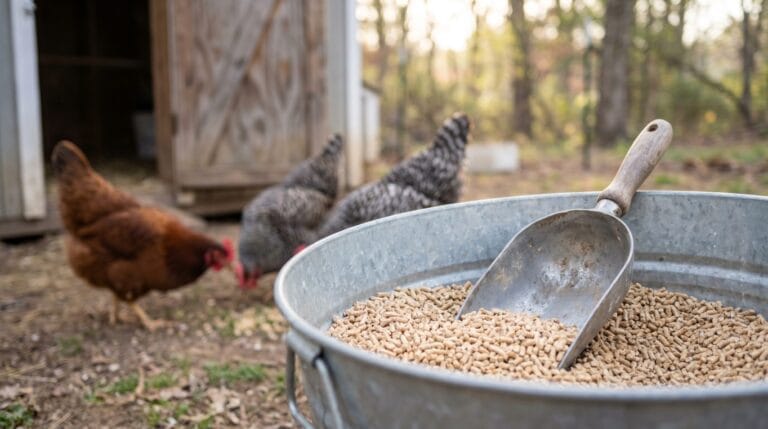
Hang both off the floor. A feeder and waterer sitting in the bedding gets fouled by droppings and litter within hours. Hanging equipment keeps it cleaner and reduces waste. For guidance on types and sizing, see the feeder and waterer placement inside the coop before you finalize your interior layout.
In winter, if you are in a climate where waterers freeze solid overnight, a heated waterer base is worth the cost. In zones 7 and above, a fresh fill in the morning is often enough. To size your feed budget, how many eggs your flock will realistically produce varies significantly by breed and season, so knowing that figure early helps you plan layer feed quantities before the birds move in.
Floor Bedding
Three to 4 inches of pine shavings or straw on the coop floor. The deep-litter method, letting bedding compost in place over the winter and cleaning it out in spring, can work well for small flocks and adds a modest insulation layer. It only works safely in a well-ventilated coop, though. In a poorly vented space or a wet climate, moisture builds up fast and produces the ammonia and mold that harm birds. Check your vent openings before committing to this method. The composted litter goes directly into the garden at the end of the season.
Grit
If your birds will not have access to bare soil and small stones while free-ranging, provide a small container of insoluble grit inside the coop. Chickens use it to grind feed in their gizzards. Without it, digestive problems follow. Layer feed and starter feed are formulated for nutrition, not digestion mechanics, grit handles that part.
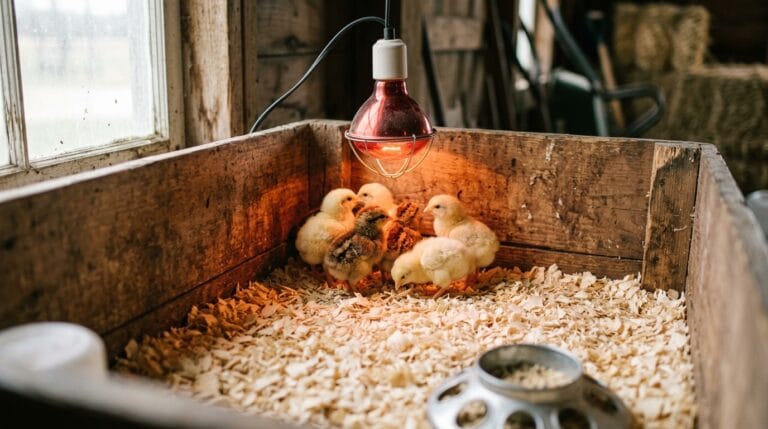
A Note on Brooders
Your finished coop is not where baby chicks live when they arrive. Chicks spend their first 6 to 8 weeks in a brooder, a warm, draft-free enclosure with a heat source, before they are feathered out enough to move into the coop. During that time, they need starter feed, not layer feed. Layer feed contains calcium levels appropriate for laying hens but too high for young birds, and feeding it too early can cause kidney damage. Plan for that transition before the chicks arrive.
From the In Homestead Shop
Starting your first flock?
The Backyard Chickens Starter Guide covers your whole first year — building and predator-proofing the coop, plus breeds, feed, and daily care — sourced from cooperative extension guidance and the Merck Veterinary Manual, with two printables.
Frequently Asked Questions About Building a Chicken Coop
Is It Cheaper to Build or Buy a Chicken Coop?
Building is usually cheaper, and you get a coop that actually fits your birds. A basic DIY 4×8 coop with a small run runs roughly $260 to $470 in materials in 2026. Comparable kit coops retail for $300 to $700, but most are labeled for more birds than they comfortably fit. If you have basic carpentry skills and a free weekend, building almost always comes out ahead financially.
Is a 4×8 Coop Big Enough for 12 Chickens?
No. A 4×8 coop gives you 32 square feet of interior space, which fits 8 standard-size hens at 4 square feet per bird. Twelve birds need at least 48 square feet of interior space, which means a footprint closer to 6×8 or 4×12. Overcrowding leads to stress, feather-picking, and a drop in laying.
What Is the Number One Killer of Backyard Chickens?
Predation is widely cited as the leading cause of chicken death for backyard flocks, followed closely by disease spread through poor ventilation and wet bedding. Mites and other parasites become a serious secondary problem when bedding stays damp and coop maintenance slips. Building with hardware cloth and keeping the interior dry handles both threats better than any supplement or treatment after the fact.
Can You Build a Chicken Coop From Pallets?
Yes, with specific caveats. Use only pallets stamped HT (heat-treated), never MB (methyl bromide treated, a pesticide). Inspect every pallet for gaps larger than 1 inch, which are large enough for small predators to reach through. Pallet wood is uneven and slower to work with than dimensional lumber, but it can meaningfully reduce material costs on a tight budget.
Do Chickens Need a Heated Coop in Winter?
Most standard cold-hardy breeds do not need supplemental heat in a well-ventilated, draft-free coop, even in climates with hard winters. Chickens generate considerable body heat collectively, and frostbite is more often caused by condensation from poor ventilation than by low temperatures. That said, if you are keeping single-comb Mediterranean breeds in a northern zone, they are more frostbite-prone and the calculus changes. What every flock needs regardless of climate is an unfrozen water source, a heated waterer base solves that without requiring you to heat the whole coop.
How Do You Keep a Coop Smelling Clean?
Ammonia smell in a coop is almost always a ventilation or bedding problem, not a cleaning frequency problem. Make sure your vent openings meet the minimum of roughly 1 square foot per 10 square feet of floor space, keep bedding dry by replacing wet spots immediately, and clean the area under roosts weekly. Turning the deep-litter bedding with a rake every week or two also controls odor while letting it compost in place.
Wrapping Up: Build It Right the First Time
The most common rebuild scenarios, undersized coops, predator breaches, respiratory sick birds, all trace back to decisions made before the first board was cut. The space math, the hardware selection, and the roost placement are not details to revisit after the flock moves in. They are the build.
A coop built to the right dimensions, with welded wire mesh instead of chicken wire, adequate ventilation, and roosts set higher than nesting boxes, will serve a small flock for a decade with only routine maintenance.
The next concrete step is straightforward: sketch your footprint, count the birds you are planning to keep, and run the square footage. If the numbers work, price the materials list at your local lumber yard. If they do not, adjust the footprint now.