How to start composting at home: a beginner’s guide
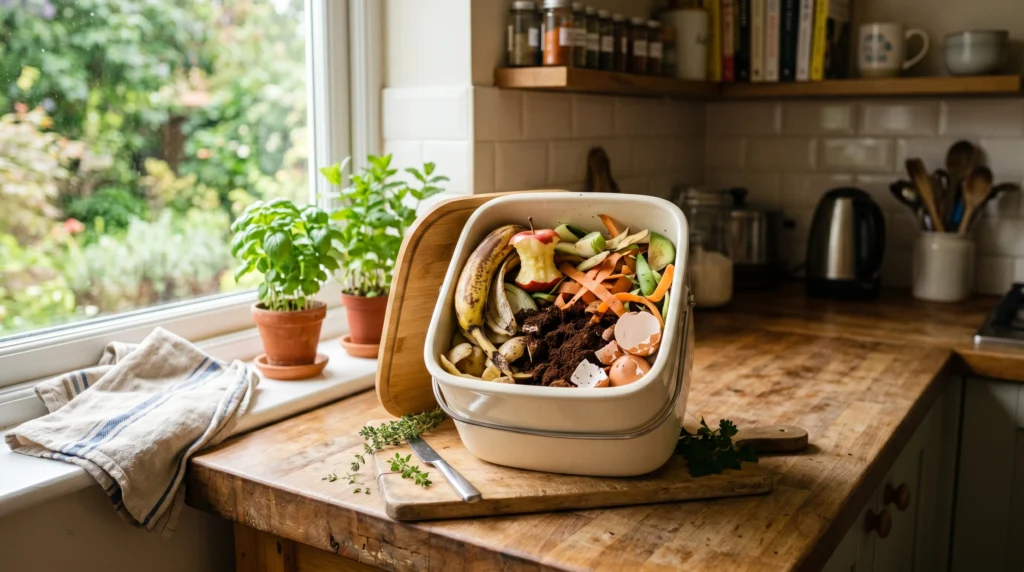
Every day, you probably toss things into the trash without much thought: banana peels, coffee grounds, eggshells, vegetable ends, dry leaves, and grass clippings. They seem like waste, but they are actually the beginning of something useful.
When you learn how to start composting, you begin to see your kitchen scraps differently. That apple core is not just garbage. Those dry leaves are not just yard mess. Together, they can become dark, crumbly compost that feeds your garden, improves your soil, and helps you waste less.
The good news? Composting at home is much simpler than it looks. You do not need to be an expert gardener, own acres of land, or buy expensive equipment. You only need the right mix of materials, a little patience, and a basic understanding of what goes into a healthy compost bin.
This beginner’s guide will show you exactly how to start composting at home step by step, what can go in your bin, what to avoid, and how to keep your compost pile working without bad smells or pests.
Table of Contents
What Is Composting?
Composting is the natural process of breaking down organic materials, such as food scraps and yard waste, into a nutrient-rich soil amendment that you can use in your garden. In simple terms, you are helping nature recycle.
Behind the scenes, tiny organisms, bacteria, fungi, insects, and worms work together to break down materials like leaves, fruit peels, vegetable scraps, coffee grounds, and grass clippings. Over time, those materials turn into compost, a dark, earthy substance that can be added to garden beds, pots, lawns, and flower beds.
The EPA describes composting as one of the most useful ways to recycle food scraps and yard trim at home, while also reducing the amount of waste sent to landfills or incinerators. Once you understand the balance between greens, browns, air, and moisture, composting becomes less intimidating and much easier to manage.
Why Start Composting at Home?
Before you build a bin or save your first kitchen scraps, it helps to know why composting is worth your time.
Learning how to start composting at home gives you several benefits at once:
- You send less food and yard waste to the trash.
- You create free compost for your garden.
- You improve soil texture and moisture retention.
- You reduce the need for some store-bought soil amendments.
- You make better use of everyday kitchen scraps.
- You build a more sustainable home routine.
According to the USDA, food scraps and yard waste make up about 20 to 30 percent of what people throw away, and composting helps recycle those materials into something that can enrich soil and plants.
For you, composting can start small. Even one countertop container and one backyard compost bin can make a noticeable difference over time. You do not have to change everything overnight. Start with fruit peels, vegetable scraps, coffee grounds, and dry leaves. Once you see how simple the process is, composting becomes a natural part of your daily routine.
How to Start Composting in 5 Simple Steps
If you are new to composting, do not overcomplicate the process. Here is how to start composting at home with five basic steps that work for almost any space or budget.
Step 1: Choose Your Composting Method
The best method to start composting depends on your space, budget, and how hands-on you want to be.
Common beginner-friendly options include:
- Backyard compost pile: A simple open pile in your yard.
- Compost bin: A contained system that keeps materials tidy.
- Compost tumbler: A rotating bin that makes turning easier.
- DIY compost bin: A homemade bin made from pallets, wire, plastic bins, or trash cans.
- Indoor composting: A good option if you live in an apartment or have limited outdoor space.
- Worm composting (vermicomposting): Uses worms to break down food scraps quickly, even indoors.
- Bokashi composting: A fermentation method that can work well for small spaces.
For most beginners, a basic backyard compost bin or compost tumbler is the easiest place to start. It keeps your compost contained, helps with airflow, and makes the process feel manageable.
Step 2: Pick the Right Location
Your compost bin should be easy to reach. If it is too far away, you may stop using it. Choose a spot that is convenient but not directly beside doors, windows, or outdoor dining areas.
A good composting location should be:
- Level and well-drained.
- Easy to access from your kitchen or garden.
- Close to a water source if possible.
- Partly shaded if you live in a hot area.
- Open enough for airflow.
You do not need a huge yard. A small corner of your garden, patio, or side yard can work well. If you are using a tumbler or sealed bin, you may only need a few square feet of space.
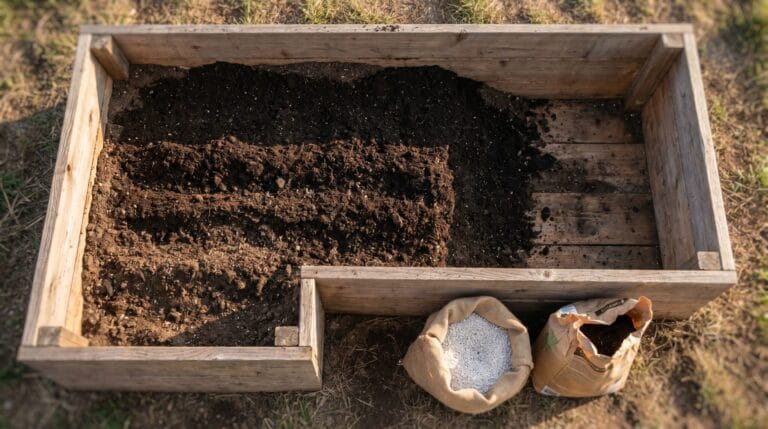
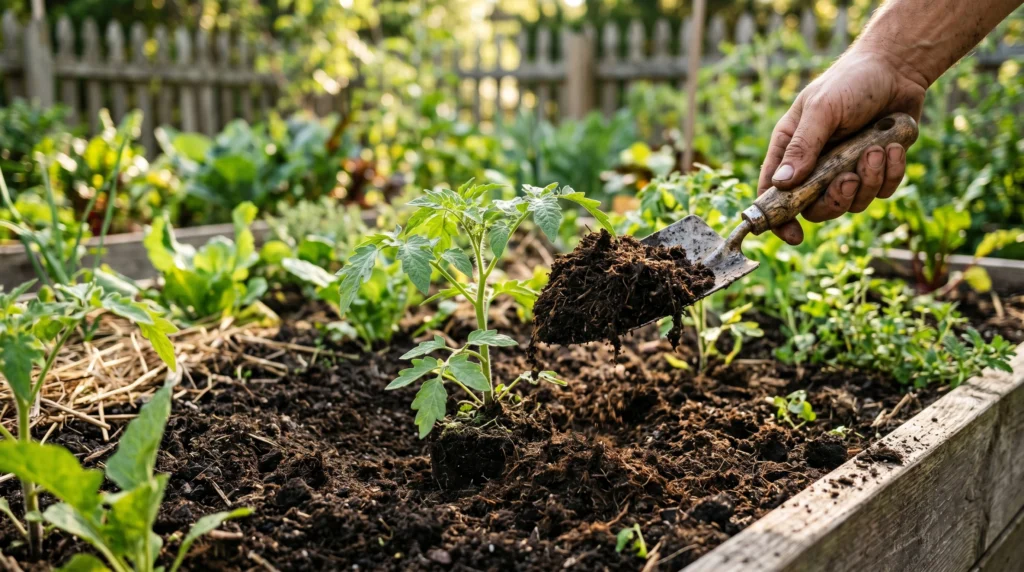
Step 3: Layer Greens and Browns Correctly
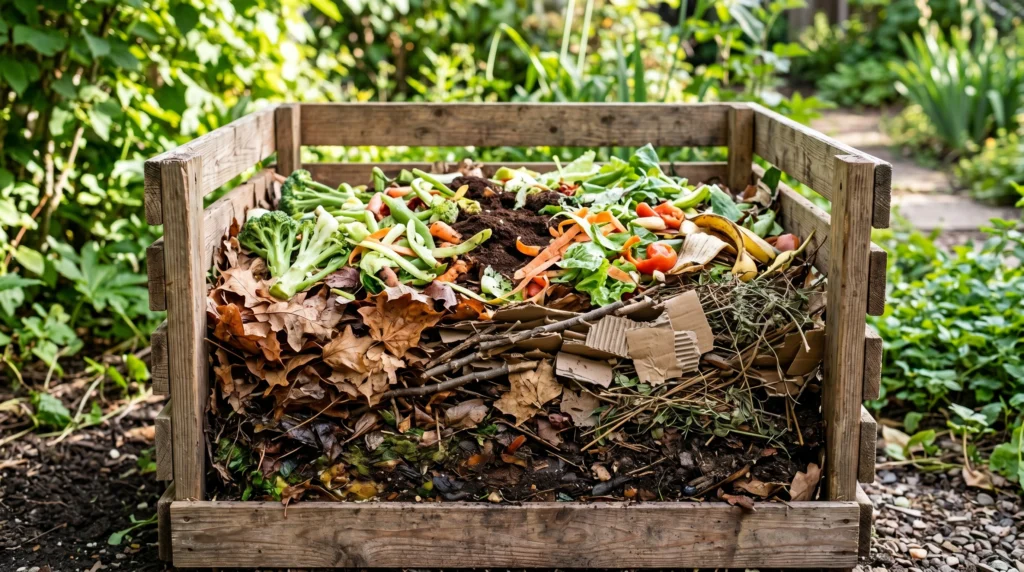
This is the part that matters most when you start composting.
A healthy compost pile needs two main types of materials: greens (nitrogen-rich) and browns (carbon-rich). The relationship between them is called the carbon to nitrogen ratio (C:N ratio), and most composters aim for roughly 25 to 30 parts brown to 1 part green by weight. You don’t need to measure precisely. As a beginner, a simple visual rule is to use 2 to 3 times more browns than greens.
Greens feed the microorganisms that break everything down. Examples include:
- Fruit scraps
- Vegetable scraps
- Coffee grounds
- Tea leaves
- Fresh grass clippings
- Plant trimmings
- Crushed eggshells
Browns add structure, absorb moisture, and keep the pile from getting slimy or smelly. Examples include:
- Dry leaves
- Shredded cardboard
- Shredded newspaper
- Straw
- Small twigs
- Paper towel rolls
- Wood chips
- Sawdust from untreated wood
How to layer your compost bin when starting out:
- Start with a base layer of coarse browns, such as small twigs, dry leaves, or straw.
- Add a thicker layer of browns.
- Add a smaller layer of greens.
- Cover food scraps with more browns.
- Add a little water if the pile feels dry.
Cornell’s composting guidance explains that the organisms working in your compost pile need food, air, moisture, and balance to break scraps down properly. The most important habit is this: never leave food scraps exposed on top. Covering scraps with dry leaves, shredded paper, or cardboard helps reduce smells and keeps pests away.
Step 4: Keep the Compost Moist and Aerated
Compost should be moist, but not soaked. A helpful comparison is a wrung-out sponge. It should feel damp, but water should not be dripping from it.
- If your compost is too dry, it will break down slowly. Add a little water or more green materials.
- If your compost is too wet, it may become slimy or smell bad. Add more browns and mix the pile.
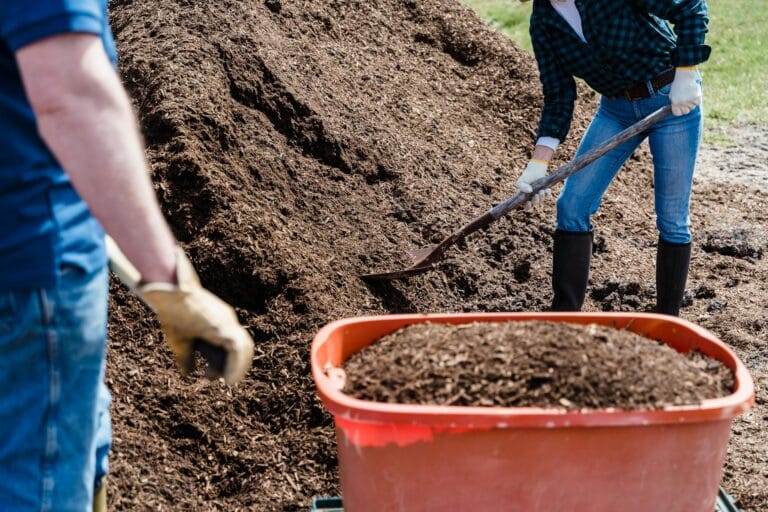
Air is just as important. Composting works best when oxygen can move through the pile. Turn your compost every week or two with a garden fork, shovel, or compost aerator. If you use a tumbler, rotate it according to the product instructions.
Step 5: Wait, Check, and Harvest
Composting takes time. Some piles break down in a few months, while slower, passive compost piles may take longer. The speed depends on moisture, temperature, material size, and how often you turn the pile.
Your compost is ready when it:
- Looks dark brown or black
- Feels crumbly
- Smells earthy
- No longer shows recognizable food scraps
- Has cooled down if it was previously warm
Finished compost can be mixed into garden soil, added around plants, sprinkled over lawn areas, or blended into potting mixes.
What Can You Put in Compost?
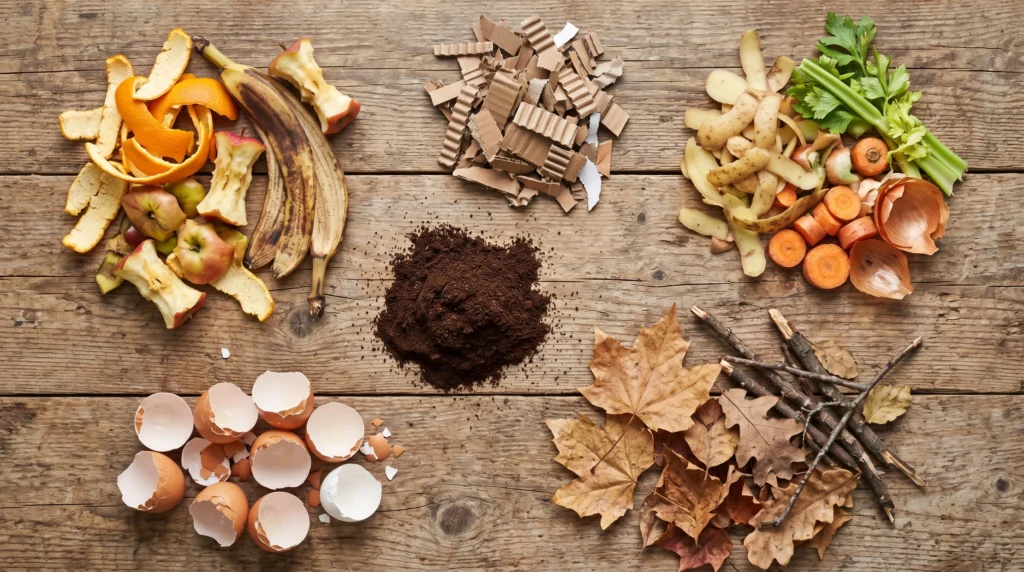
One of the biggest beginner questions is: what can be composted? Most plant-based kitchen scraps and natural yard materials can go into a home compost bin. The key is balancing wet, nitrogen-rich greens with dry, carbon-rich browns every time you add to the pile.
Kitchen Items You Can Compost
- Fruit peels and cores
- Vegetable scraps
- Coffee grounds
- Paper coffee filters
- Loose tea leaves
- Crushed eggshells
- Corn cobs, chopped smaller
- Stale bread in small amounts
- Plain cooked rice or pasta in small amounts
Yard Items You Can Compost
- Dry leaves
- Grass clippings
- Small twigs
- Plant trimmings
- Old flowers
- Straw and hay
- Untreated wood chips
- Pine needles in moderate amounts
Paper and Cardboard You Can Compost
- Shredded newspaper
- Plain cardboard
- Paper towel rolls
- Toilet paper rolls
- Uncoated paper bags
- Plain paper napkins
Avoid glossy, coated, or heavily printed paper. These materials may not break down well and may contain unwanted coatings.
Getting the Right Mix
If you want healthy compost, focus on balance. A pile made only of food scraps can become wet and smelly. A pile made only of dry leaves can take a long time to break down. The best compost includes a mix of nitrogen-rich greens, carbon-rich browns, moisture, and air.
A balanced compost addition might look like this:
- Vegetable scraps from dinner
- Coffee grounds from breakfast
- A handful of crushed eggshells
- Two handfuls of dry leaves
- A few pieces of shredded cardboard
Every time you add wet food scraps, add dry brown material too. That small habit solves most beginner composting problems before they start.
What Not to Put in Compost
Some materials are better left out of a beginner compost bin because they can smell, attract pests, spread disease, or break down too slowly. Avoid adding:
- Meat, fish, and bones
- Dairy products
- Butter, oils, and grease
- Pet waste
- Diseased plants
- Invasive weeds or weeds with seeds
- Glossy paper
- Plastic
- Treated wood
- Charcoal ash
- Large branches that have not been chipped
Colorado State University Extension notes that fats, oils, grease, meat, and dairy can slow decomposition and attract pests, while pet or human waste may transmit disease.
If you are just starting, keep your compost simple. Stick with fruit and vegetable scraps, coffee grounds, eggshells, dry leaves, cardboard, and yard waste.
DIY Compost Bin Ideas for Beginners
You do not have to buy a fancy bin to start composting. A DIY compost bin can work just as well if it allows airflow, holds materials together, and gives you access to mix or remove finished compost.
Plastic Storage Bin Compost Bin
Use a large plastic storage tote with a lid. Drill holes in the sides, bottom, and lid for airflow and drainage. Add browns and greens inside, then mix regularly.
Best for: patios, small yards, beginners, and renters.
Wooden Pallet Compost Bin
Use three or four untreated wooden pallets to create a simple square bin. This is a good option if you have a backyard and want a larger composting setup.
Best for: larger gardens, yard waste, leaves, grass clippings, and low-cost backyard composting.
Wire Mesh Compost Ring
Shape wire mesh into a circle, secure the ends, and add your compost materials inside. This option is simple, breathable, and easy to move.
Best for: dry leaves, garden waste, and easy airflow.
Trash Can Compost Bin
Drill air holes around the sides and bottom of a trash can with a locking lid. Add your compost materials, then roll the bin occasionally to mix it.
Best for: contained composting, small outdoor areas, and keeping materials tidy.
No matter which DIY compost bin you choose, make sure it has airflow. Compost needs oxygen to break down properly.
Common Composting Mistakes Beginners Make
Composting is forgiving, but a few common mistakes can slow things down.
Adding too many food scraps. Food scraps are useful, but they need browns to balance them. Too many greens can create odor and excess moisture.
Forgetting browns. Dry leaves, cardboard, and shredded paper are not optional. They are essential for structure and balance.
Letting the pile dry out. A dry compost pile will break down slowly. Check the moisture regularly, especially in hot weather.
Not turning the compost. You do not have to turn compost every day, but occasional mixing adds oxygen and speeds decomposition.
Adding the wrong materials. Meat, dairy, oil, and pet waste can cause problems in a home compost bin. Keep them out, especially as a beginner.
Giving up too soon. Composting is not instant. Some materials take weeks or months to break down. Keep adding balanced materials and let the process work.
Quick Compost Troubleshooting Guide
| Compost Problem | Likely Cause | Easy Fix |
|---|---|---|
| Bad smell | Too many greens or too much moisture | Add dry browns and turn |
| Slimy texture | Not enough airflow | Add cardboard or leaves and mix |
| Very slow breakdown | Too dry or too many browns | Add greens and water |
| Flies around bin | Exposed food scraps | Bury scraps under browns |
| Pests nearby | Wrong food added | Avoid meat, dairy, oils, and bones |
A well-balanced compost bin should not smell like garbage. It should smell earthy, especially once it starts breaking down properly.
How Long Does Compost Take?
Compost typically takes 2 to 6 months to finish, though passive piles that are rarely turned can take a year or more. The speed depends on your method, the size of your materials, moisture, temperature, and how often you turn the pile.
Iowa State University Extension notes that an enclosed backyard compost pile is often best between 3 feet by 3 feet by 3 feet and 5 feet by 5 feet by 5 feet, and composting may take six months or more depending on management.
To help compost break down faster:
- Chop large scraps into smaller pieces
- Turn the pile regularly
- Keep it moist, not soaked
- Balance greens with browns
- Avoid large branches unless chipped
- Keep the pile large enough to hold some heat
There are two common composting styles:
- Hot composting: More active, turned frequently, and usually faster. Heats up enough to kill weed seeds.
- Cold composting: Slower, easier, and less hands-on.
Beginners can start with either method. If you want faster compost, turn the pile more often and keep the balance right. If you prefer a low-effort approach, cold composting may be better.
You will know your compost is ready when it looks dark, crumbly, and smells like fresh soil.
Composting in Different Climates
Composting works almost anywhere, but your climate affects how the pile behaves.
Hot, dry climates: Your pile will dry out faster. Keep it in partial shade, check moisture often, and consider using a closed bin to help retain moisture.
Cold climates: Composting slows in winter, but you can still add materials. A larger pile holds heat better than a small one. Once temperatures rise, the pile will become more active again.
Humid or rainy climates: Too much water can make compost soggy. Use a covered bin or tarp to prevent the pile from getting waterlogged. Add extra browns to absorb moisture.
Apartments or no yard: If you do not have outdoor space, you can still compost. Try vermicomposting, bokashi composting, a small balcony tumbler, or a local community composting drop-off site.
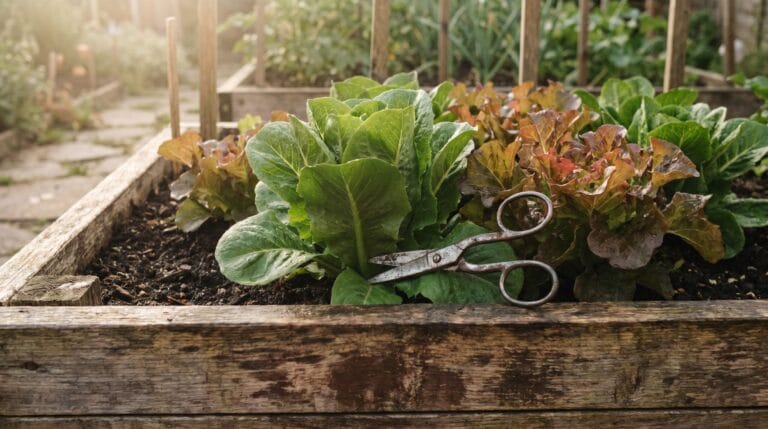
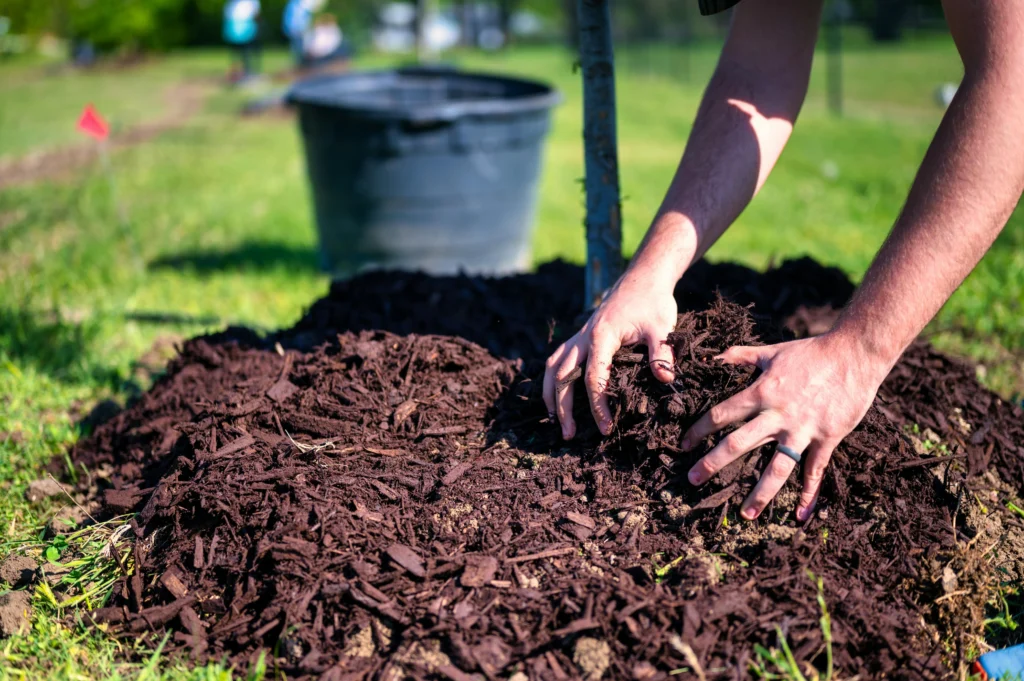
How to Use Finished Compost
Once your compost is ready, you can use it in several ways around your home and garden:
- Mix it into vegetable garden beds
- Add it around flowers and shrubs
- Blend it into potting soil
- Spread it lightly over your lawn
- Add it to raised beds
- Use it as a top dressing around plants
Compost helps improve soil structure and supports healthier growing conditions. The EPA also notes that compost can improve soil health and provide environmental benefits when used properly.
Compost helps improve soil structure and supports healthier growing conditions. For more practical ways to use compost in your garden, see this guide on compost and gardening.
Do not plant directly into pure compost for most plants. Instead, mix it with soil or use it as a soil amendment.
Beginner Composting FAQs
Can you compost without a backyard?
Yes. You can use a small outdoor bin, balcony compost tumbler, indoor worm bin, or community composting service. If you live in an apartment, start with a small food scrap container and look for local drop-off options.
Does compost smell bad?
Healthy compost should smell earthy. If it smells rotten, it is probably too wet or has too many greens. Add dry browns and turn it.
Can you put eggshells in compost?
Yes. Crushed eggshells can go into compost. Rinsing and crushing them helps them break down more easily.
Can you compost in winter?
Yes. Composting slows down in cold weather, but you can keep adding materials. The pile will become active again as temperatures rise.
What is the easiest composting method for beginners?
A simple backyard compost bin or compost tumbler is usually easiest. It keeps materials contained and gives you a clear place to add scraps.
Do you need a compost starter or accelerator?
Not really. A handful of finished compost or garden soil can introduce helpful microorganisms. Most beginners can start composting without buying a commercial starter.
Can you compost weeds?
You can compost some weeds, but avoid weeds that have gone to seed or invasive weeds. If your compost pile does not get hot enough, those seeds may survive and spread later.
Final Thoughts: Start Small and Keep Going
You do not need a perfect system to start composting. You only need a small place to collect organic materials, a mix of greens and browns, some moisture, and a little patience.
Start with what you already have. Save your vegetable scraps. Collect dry leaves. Shred a cardboard box. Add everything to a simple compost bin and cover fresh scraps with browns.
Once you learn how to start composting, it becomes less of a chore and more of a habit. You begin to notice how much useful material you used to throw away. Over time, those scraps become rich compost that can feed your garden, support your plants, and help you build a more sustainable home.
Ready to begin? Set up a small compost bin this week, keep a container for kitchen scraps, and start with one simple rule: every time you add greens, cover them with browns.