
How to Can Peaches Step by Step
New canners tend to find the peach-canning process more intimidating on paper than it turns out to be in practice. The fruit prep takes longer than most guides suggest, the kitchen gets warm, and the sequence of steps feels unfamiliar the first time through. Those friction points are real, and this guide names them alongside the instructions.
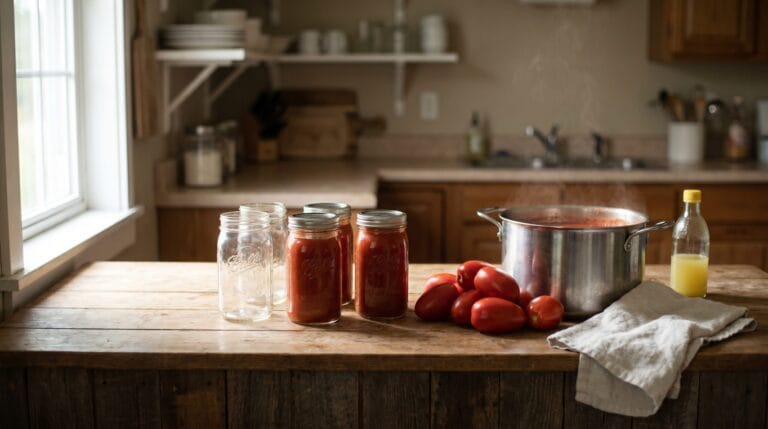
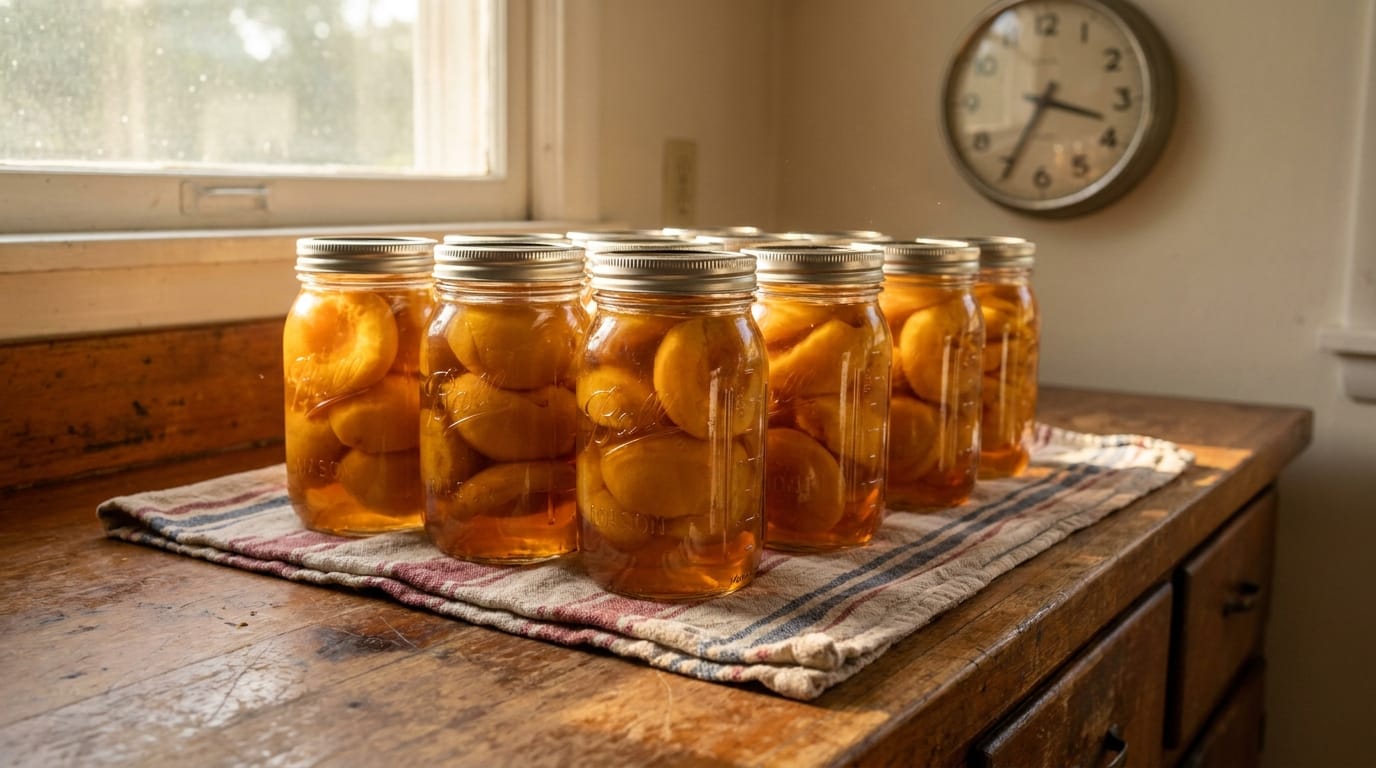
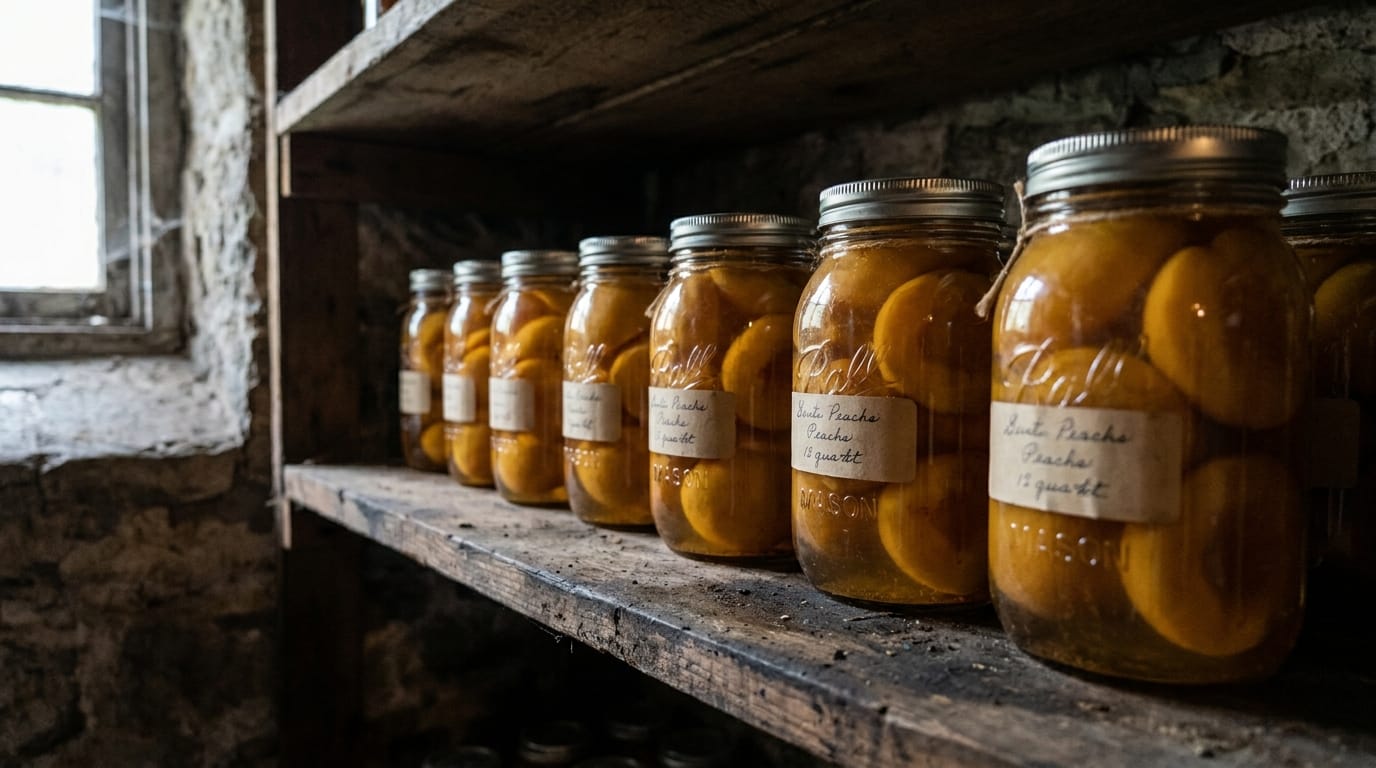
What you end up with is a shelf of jars that carry peak-season fruit through winter without refrigeration. The method is straightforward, the failure modes are predictable, and most of them are preventable with a little preparation.
How to can peaches at home, peel and pit them, pack them into sterilized quart or pint jars with a light sugar syrup or plain water, leave one-half inch of headspace, and process in a boiling water bath canner for 20 to 30 minutes depending on jar size and altitude. Use firm-ripe peaches, not soft ones, or they will turn mushy in the jar.
Quick Answer
- Peaches are a high-acid fruit, so a water bath canner works fine. No pressure canner needed.
- Use firm-ripe freestone peaches (Elberta, Reliance) for the cleanest results.
- Blanch 30 to 60 seconds, peel, pit, and treat with ascorbic acid or lemon juice to prevent browning.
- Pack into warm jars with light syrup or plain water, leaving 1/2 inch of headspace.
- Process pints for 20 minutes, quarts for 25 minutes at sea level. Add 5 minutes per 1,000 feet above 1,000 feet elevation.
- Let jars rest undisturbed 12 to 24 hours, then check seals before storing.
- One 7-quart batch takes roughly 3 to 4 hours total and about 17 to 18 lb of fresh peaches.
What You Need Before You Start
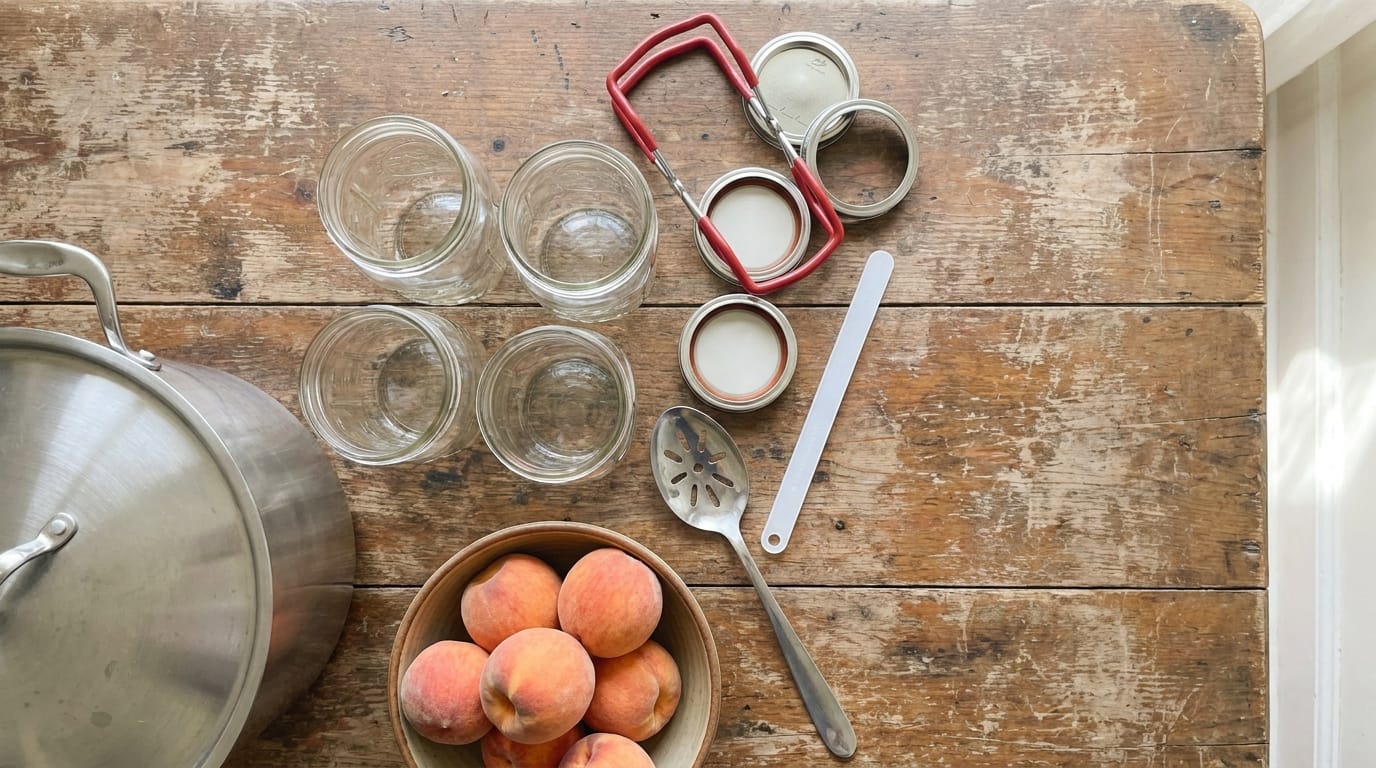
Gather everything before you bring out the peaches. Canning moves faster once the fruit is peeled, and you do not want to be hunting for a jar lifter while your syrup cools.
Canning Equipment
- Water bath canner with a rack inside (the rack keeps jars off the bottom and lets water circulate). This is not the same as a pressure canner. Peaches are a high-acid fruit, which means the boiling water method is safe and correct. A pressure canner is reserved for genuinely low-acid foods like green beans or garlic. Note that tomatoes are a borderline-acid food, they sit near the safe threshold and require added acidification (bottled lemon juice or citric acid) even in a water bath canner, per USDA and NCHFP guidance.
- Wide-mouth quart or pint mason jars. New lids every time. Bands can be reused if they are rust-free and undented.
- Jar lifter. Non-negotiable. Hot jars will burn your hands without one.
- Bubble remover or thin spatula for releasing air pockets before sealing.
- Large pot (separate from your canner) for blanching peaches.
- Slotted spoon and ladle.
- Ice bath (large bowl, cold water, ice) for stopping the blanching process.
Fruit and Other Ingredients
For a full 7-quart load, plan on roughly 17 to 18 lb of fresh peaches per batch, according to extension guidance on water bath canning yields. That is a standard flat or small bushel basket. For pints, the same weight fills 9 jars.
You will also need sugar and water for syrup, or plain water if you prefer no added sugar. The National Center for Home Food Preservation (NCHFP) is the authoritative source for tested syrup ratios and is worth bookmarking before you start.
How to Choose and Prep Peaches for Canning
The most common reason canned peaches turn mushy has nothing to do with processing time. It starts at the grocery store or farmers market, with the wrong peach at the wrong stage of ripeness.
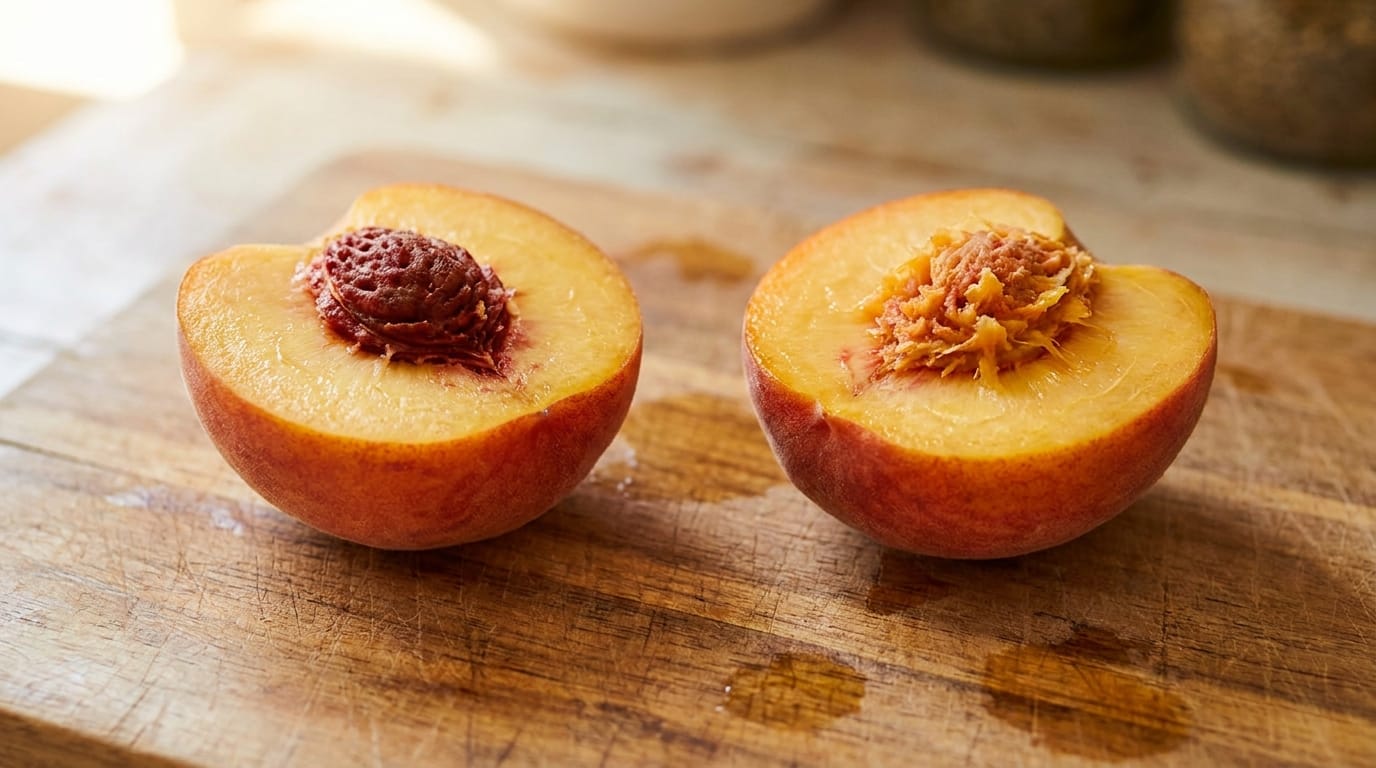
Freestone vs. Clingstone
Freestone varieties (Elberta, Reliance, Contender, Loring) have pits that separate cleanly from the flesh when halved. Clingstone varieties do not. For canning, freestone is significantly easier to work with. Trying to cut clingstone peaches away from the pit cleanly is slow, wastes fruit, and produces uneven pieces. If you see “canning peaches” at a farm stand, they are almost always freestone.
The Firm-Ripe Test
The right peach gives slightly to gentle thumb pressure but does not feel soft or squishy. A hard peach is not ready. A soft peach has already started breaking down and will turn to pulp in the canner. USDA guidance on home canning recommends selecting firm-ripe fruit for best texture results.
Beginners often underestimate how narrow this window is. At peak peach season, a box of fruit at the right stage can become overripe in two days at room temperature. If you are not canning the same day you buy, refrigerate them.
Blanching and Peeling
Bring a large pot of water to a boil. Score an X in the bottom of each peach, lower them in for 30 to 60 seconds, then immediately transfer to an ice bath. The skins will slip off with almost no effort. According to USDA home canning guidance, this blanching window of 30 to 60 seconds is sufficient for ripe fruit; go longer and you start cooking the peach before it hits the jar.
Preventing Browning
Cut peaches oxidize fast. Keep a bowl of cold water with either 1/2 teaspoon of ascorbic acid per quart, or 1/4 cup of bottled lemon juice per quart, and drop peach halves in as you pit them. Ascorbic acid (sold as Fruit-Fresh or in the canning aisle) works better than lemon juice and does not add flavor. Drain lightly before packing.
Syrup Options: Sugar, Honey, and No Sugar
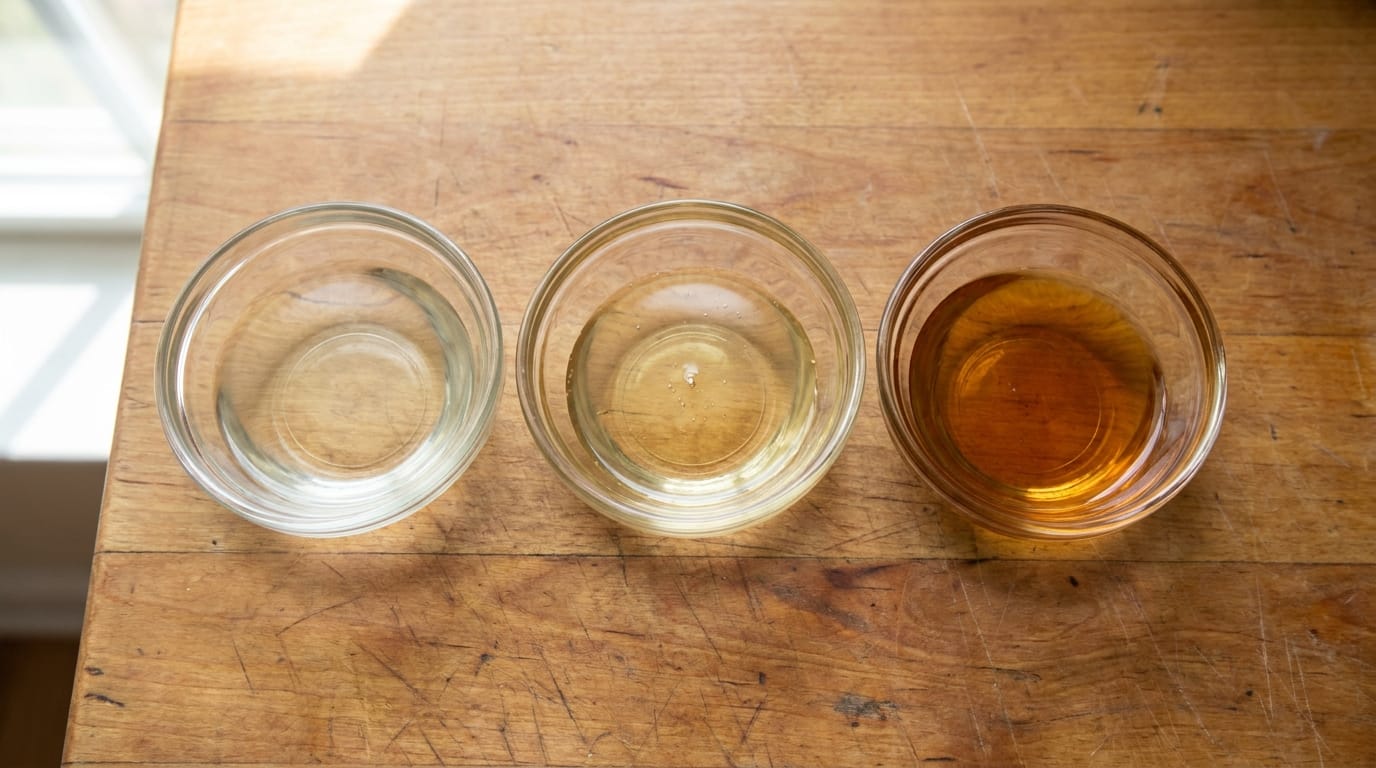
Sugar in canned peaches is not a preservative. The acidity of the fruit is what makes the jar shelf-stable. Sugar is purely about flavor and texture. That means you have real flexibility here.
Common Syrup Ratios
| Syrup Type | Sugar | Water | Notes |
|---|---|---|---|
| Extra-light | 1.25 cups | 5.5 cups | Closest to natural peach flavor |
| Light | 2.25 cups | 5.75 cups | Most common beginner choice |
| Medium | 3.25 cups | 5 cups | Noticeably sweet |
| No-sugar | 0 | As needed | Use plain water or unsweetened white grape juice |
Dissolve sugar in water over medium heat, stirring until clear. Make the syrup before you start peeling fruit, and keep it warm on a back burner. Cold syrup poured over warm fruit can crack jars.
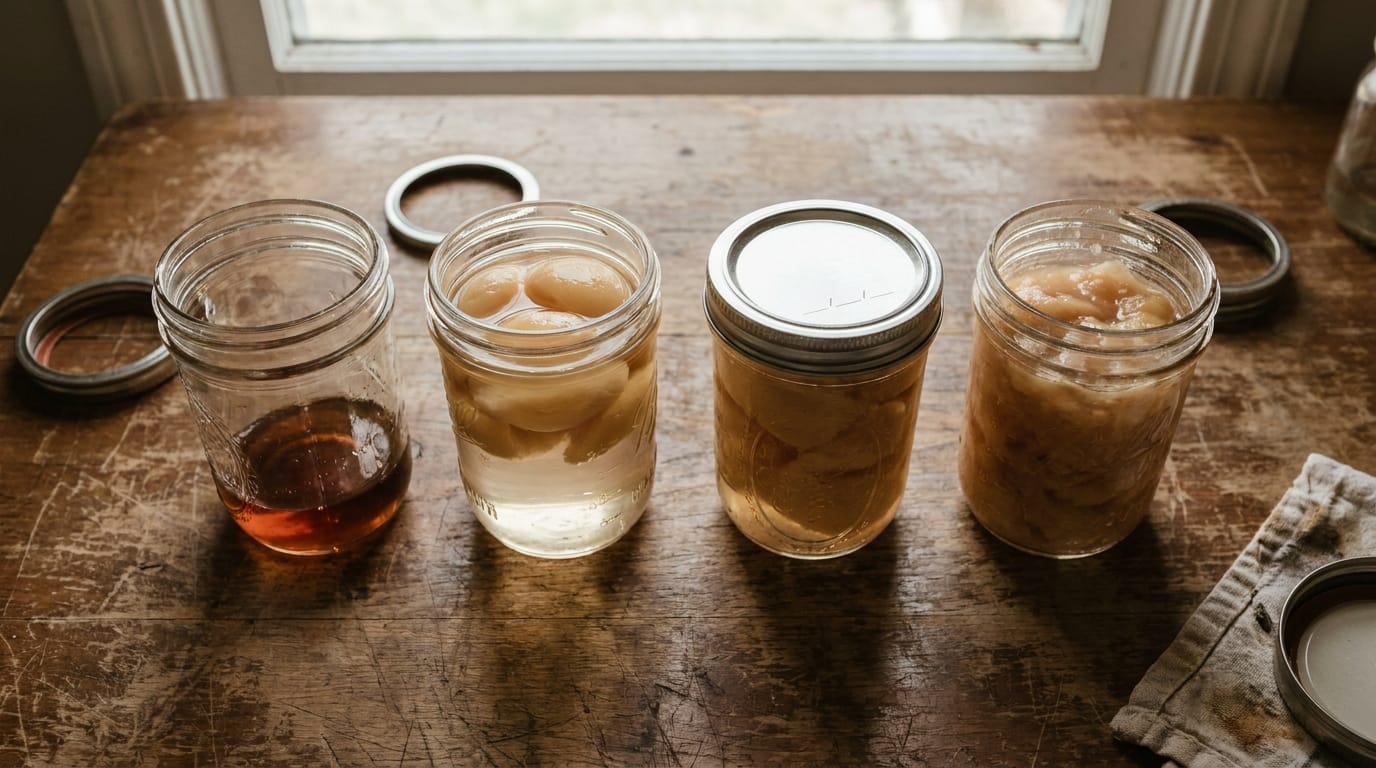
No-Sugar Option
You can absolutely can peaches without any sugar. Use plain water or unsweetened white grape juice in place of syrup. The NCHFP has tested, approved recipes for no-sugar peach canning using both water and juice as packing liquids. Processing times remain the same. Texture may be slightly softer without sugar, and the peaches will be paler in color, but they are fully safe and shelf-stable.
Honey syrup is also an option, substitute honey for part of the sugar, but it changes the flavor noticeably and is not necessary from a safety standpoint.
Step-by-Step: How to Can Peaches in a Water Bath
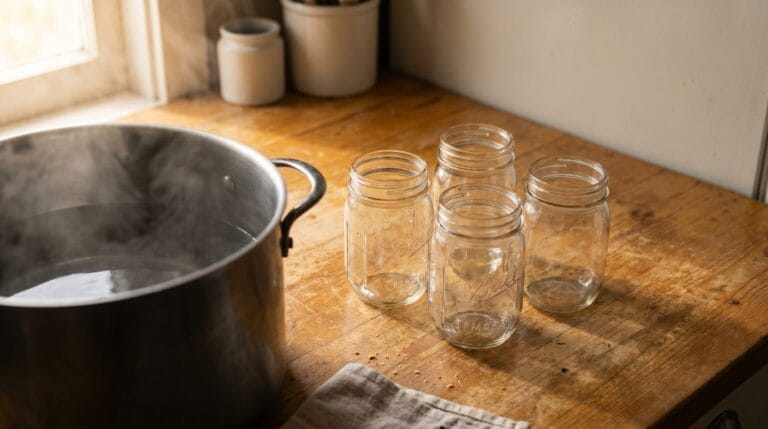
Step 1: Sterilize and Warm Your Jars
Run jars through the dishwasher on a hot cycle, or boil them for 10 minutes in the canner. Keep jars warm until you fill them. A cold jar receiving hot syrup can crack.
Step 2: Choose Your Pack Method
Raw pack: Peach halves go directly into jars raw, then hot syrup is added. Easier but produces more floaters and lighter color.
Hot pack: Briefly heat peach halves in syrup for 2 to 3 minutes before packing them. Better color retention, fewer air pockets, less floating fruit. Most experienced canners recommend hot pack for peaches. For a first batch, hot pack is worth the extra step.
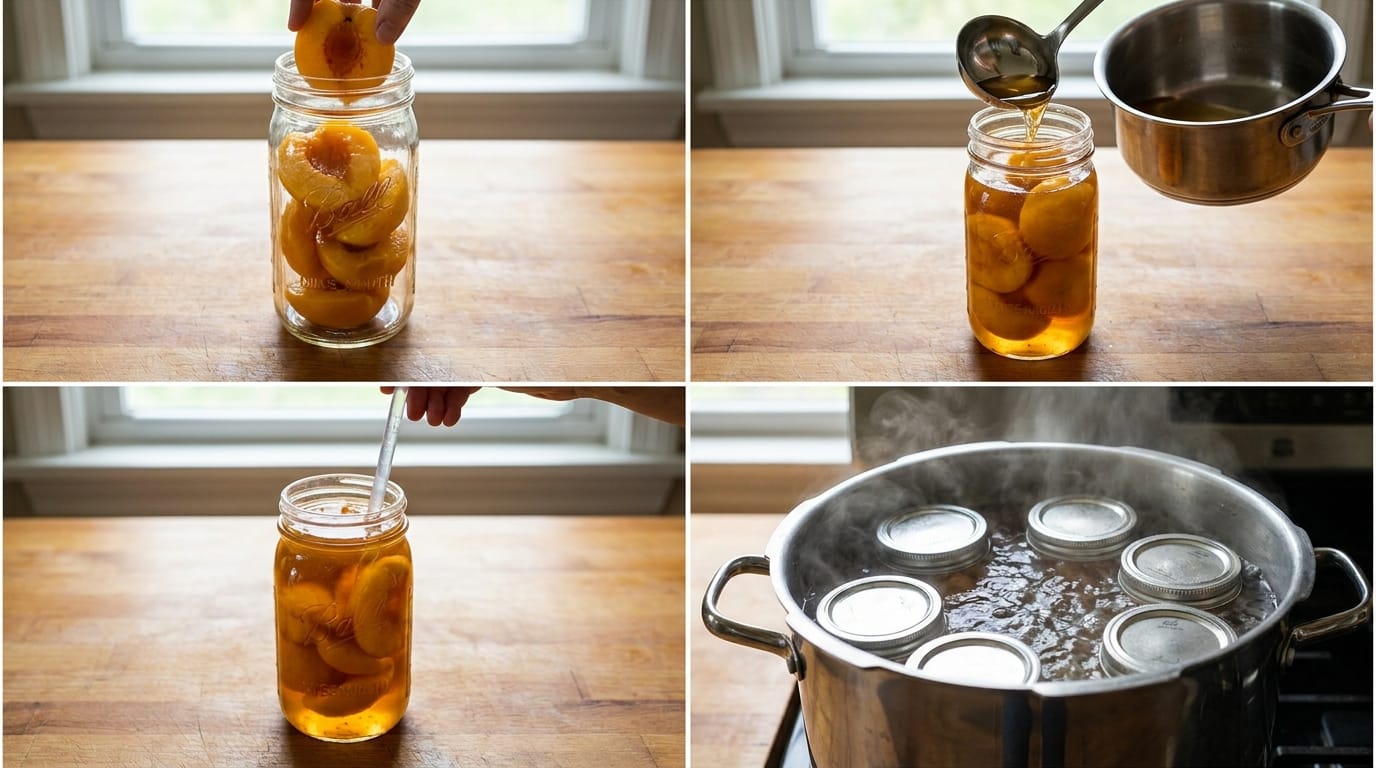
Step 3: Fill and Seal Jars
Place peach halves cut-side down into warm jars, working in layers. Ladle warm syrup over the fruit, leaving exactly 1/2 inch of headspace at the top. Too little headspace and the lids may not seal; too much and you risk oxidation at the headspace.
Run a thin spatula around the inside edge of each jar to release air bubbles. Wipe the rim with a clean damp cloth. Set the lid on, then screw the band to fingertip-tight. Not cranked down. Overtightening is a direct cause of siphoning (liquid loss during processing) and failed seals.
Step 4: Process in the Canner
Lower jars onto the rack in the canner. Water should cover jars by at least 1 to 2 inches. Bring to a full boil, then start timing.
According to NCHFP tested processing times for peaches:
- Pints: 20 minutes at sea level
- Quarts: 25 minutes at sea level
- Altitude adjustment: Add 5 minutes for altitudes between 1,001 and 3,000 feet; add 10 minutes for 3,001 to 6,000 feet; add 15 minutes for above 6,000 feet.
If you are not sure of your altitude, your local cooperative extension office can confirm it, or look it up using a free online elevation tool before you start. Skipping the adjustment when you live above 1,000 feet is an under-processing error.
Do not reduce processing times. Under-processing is the one safety error you cannot undo.
Step 5: Cool and Check Seals
When processing time is complete, turn off heat and let jars rest in the canner for 5 minutes before removing. Lift jars straight up (do not tilt) and set them on a towel, spaced an inch apart. Leave them completely undisturbed for 12 to 24 hours.
To check a seal: press the center of the lid. A properly sealed lid is concave and does not flex. If it pops up and down, it did not seal. Refrigerate unsealed jars and use within one week, or reprocess within 24 hours using a new lid.
How Long Does Canning Peaches Take (And What It Costs)
Most guides skip straight to processing times without giving beginners a realistic picture of the full session. Knowing where the time actually goes makes it easier to plan your day.
Realistic Time Breakdown
| Stage | Time |
|---|---|
| Setup (gather equipment, sterilize jars, make syrup) | 30 minutes |
| Blanching, peeling, and pitting | 45 to 60 minutes |
| Filling jars | 30 minutes |
| Processing in canner | 25 to 30 minutes |
| Rest in canner post-processing | 5 minutes |
| Cooling on counter | 12 to 24 hours (hands-off) |
Total active time for a 7-quart batch runs about 2 to 2.5 hours. The cooling period is passive. Plan to start by mid-morning if you want jars sealed and cooling before dinner.
Realistic Cost Breakdown (Approximate, Varies by Region)
Fresh peaches at peak season farmers markets generally run somewhere between $1 and $2 per lb, though prices vary considerably depending on your region and the year. At 17 to 18 lb per 7-quart batch, that puts the fruit cost at roughly $17 to $36. New lids run approximately $0.30 to $0.50 each at most hardware or grocery stores, and a light syrup uses only a pound or two of sugar per batch.
Store-brand canned peaches typically run somewhere around $1.50 to $2.50 per quart jar, though retail prices shift. Home-canned peaches are cost-competitive at peak-season prices, but not dramatically cheaper. The real value is quality: a peach canned at the right stage of ripeness, in syrup you controlled, tastes noticeably better than a commercial product.
The canner and jars are one-time purchases. Lids are the only recurring supply cost.
The Four Most Common Canning Failures and How to Prevent Them
1. Siphoning (Liquid Loss During Processing)
You pull a jar from the canner and notice the liquid level is an inch lower than when you packed it. This is siphoning. Causes: not enough headspace, bands screwed too tight, or lifting jars out of the canner too quickly. Fix: leave exactly 1/2 inch of headspace, fingertip-tighten bands only, and let jars rest 5 minutes in the canner before removing. Siphoned jars that have sealed are still safe to eat but should be used first since the exposed fruit at the top may discolor.
2. Floating Peaches
Peach halves floating to the top of the jar are a cosmetic issue, not a safety one. Raw-packed peaches float more than hot-packed ones. Over-ripe fruit is also more prone to floating because the cell structure has already started breaking down. Switch to hot pack and use fruit that is properly ripe but still holds its shape to minimize it.
3. Failed Seals
A lid that flexes up and down after cooling did not seal. This happens with nicked jar rims (always wipe rims before lidding), old or reused lids, or bands that were too loose or too tight. Refrigerate and use within one week, or reprocess within 24 hours with a new lid. NCHFP guidance on seal failure recommends checking seals the morning after canning rather than immediately, as lids can take several hours to fully seat.
4. Mushy Texture
Mushy peaches come from two places: over-ripe fruit going into the jar, or processing longer than the tested time. Both are preventable. Use the firm-ripe test before you buy. Follow the NCHFP processing times exactly and do not add extra minutes “just to be safe.” Longer processing does not make canned food safer, it only degrades texture.
How to Store and Use Your Canned Peaches
Storage Conditions
Store jars in a cool, dark location between roughly 50 and 70 degrees F. Avoid anywhere near a heat source (a shelf above the stove is a common mistake) and avoid direct sunlight, which fades color and degrades quality over time. A basement pantry, interior closet, or root cellar works well. Garages and sheds are a poor choice in most climates since they swing well outside that temperature range in summer heat or hard freezes.
How Long Do They Last?
The USDA recommends consuming home-canned peaches within 12 to 18 months for best quality. Properly sealed jars remain safe beyond that window, but color and texture decline noticeably after two years. If you open a jar and the peaches smell off, the liquid is cloudy, the lid was unsealed, or you see any mold, discard it without tasting. Keep in mind that botulism toxin is odorless and colorless, so a jar can look and smell completely normal and still be unsafe if the seal was compromised or processing steps were skipped. When in doubt, throw it out.
As for the question of 30-year-old canned peaches: the safety depends entirely on seal integrity and storage conditions, not the age alone. Quality degrades significantly after two years, and it is not a gamble worth taking. Date your jars with a marker and rotate your stock.
Freezing vs. Canning
Freezing is faster, preserves a brighter, fresher flavor, and requires no special equipment beyond bags or containers. Canning is shelf-stable without electricity, which matters if you have a chest freezer that could fail or live somewhere with unreliable power.
Both are legitimate choices. If you want to explore other ways to preserve fruit at home, water bath canning is just one of several approaches worth having in rotation.
Ways to Use Canned Peaches
Peach cobbler is the obvious starting point. Beyond that: spooned over plain yogurt, stirred into oatmeal, blended into smoothies, or served alongside pork chops where the sweetness cuts through the fat. The syrup left in the jar is worth saving too. It makes a simple glaze or can be added to sparkling water.
If you want other water bath canning projects to run alongside peaches, strawberry-rhubarb jam uses the same equipment and a similar process.
Frequently Asked Questions About Canning Peaches
Can You Can Peaches Without Sugar?
Yes. Plain water or unsweetened white grape juice are both safe, tested alternatives to sugar syrup. The NCHFP has approved recipes for both. Sugar is not a preservative in this process, the natural acidity of the peaches is what makes them safe for water bath canning. Peaches canned in plain water will be paler and slightly softer, but shelf-stable and safe.
How Do You Keep Peaches from Turning Brown When Canned?
Treat cut peaches with an ascorbic acid solution (1/2 teaspoon of ascorbic acid powder per quart of cold water) or a lemon juice solution (1/4 cup bottled lemon juice per quart of water) immediately after pitting. Drop halves into the solution as you work, and drain lightly before packing. Ascorbic acid is more effective and adds no perceptible flavor.
Can You Can Peaches Without a Canner?
A dedicated water bath canner is the easiest tool for the job, but not strictly required. Any large stockpot that is deep enough to hold jars covered by 1 to 2 inches of boiling water will work, provided you put a rack or folded towel on the bottom to keep jars off the direct heat. Without the rack, jars can crack from uneven heat. The pot needs a lid to maintain a boil throughout processing.
Is It Better to Freeze or Can Peaches?
Freezing is faster, requires no special equipment, and preserves slightly brighter flavor. Canning takes more time and gear but produces jars that store at room temperature for 12 to 18 months without electricity. If your freezer space is limited or you want shelf-stable storage, canning is the stronger choice. If ease and flavor are the priority, freezing wins.
How Do You Make Peach Cobbler with Canned Peaches?
Drain the peaches (reserve the syrup if you like), spread them in a baking dish, and top with a simple biscuit or cake batter. Bake at 350 degrees F until the topping is golden and cooked through, roughly 35 to 45 minutes. Canned peaches in light syrup work perfectly here since they are already soft and sweet. A full cobbler recipe is worth its own post, but any tested cobbler recipe that calls for canned peaches will work with home-canned ones.