Homemade Brown Gravy: A Simple Guide for Perfect Results Every Time
There’s a reason gravy is the first thing your fork goes hunting for on a Sunday dinner plate. That ribbon of glossy, savory richness pooling around the mashed potatoes, soaking into the roast, dripping down the side of a biscuit — it’s the difference between dinner and Dinner.
But making it from scratch? That’s where a lot of home cooks tap out. Maybe you grew up watching your grandmother stir a saucepan and somehow conjure liquid gold without measuring anything. Maybe your own attempts have ended in lumpy beige paste, or worse, that thin, floury water that nobody wants to admit happened. Maybe you’ve just defaulted to those packets that taste mostly like salt and disappointment.
Here’s the good news: homemade brown gravy is one of the easiest things you’ll ever cook. You don’t need drippings. You don’t need a roast in the oven. You don’t even need any special equipment beyond a saucepan and a whisk. With five pantry ingredients and about 15 minutes, you can make a gravy that beats anything from a jar — and once you learn the technique, you’ll never need a recipe card again.
Let’s walk through it.
Table of Contents
What Makes Homemade Brown Gravy Different from Store-Bought
The gulf between scratch gravy and the boxed or jarred kind is bigger than most people realize. Pull a packet off the shelf and read the ingredients: maltodextrin, modified food starch, hydrolyzed corn protein, caramel color, MSG, and a long parade of additives meant to fake the depth that real ingredients give you for free.
Homemade brown gravy is just butter, flour, broth, and seasoning. That’s it. No preservatives, no fillers, no powder pretending to be flavor. The taste is cleaner, the texture is silkier, and you control exactly how much salt goes in.
The cost difference is just as striking. A small jar of grocery store gravy runs $3 to $5 and feeds maybe four people. A batch of homemade brown gravy from pantry staples costs under a dollar and feeds the same crowd — usually with leftovers. And the time investment? About 15 minutes, which is faster than a run to the store and back.
Once you taste the real thing, the boxed version starts to taste like what it actually is: a salty approximation of food.
The Core Ingredients of Homemade Brown Gravy
The beauty of this recipe is how short the shopping list is. Chances are, your kitchen is already stocked with most of what you’ll need.
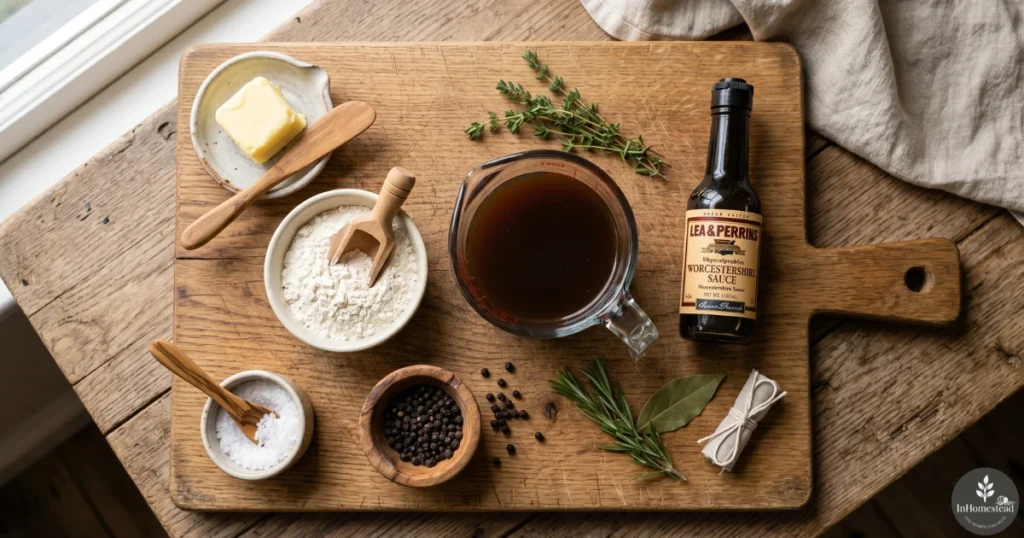
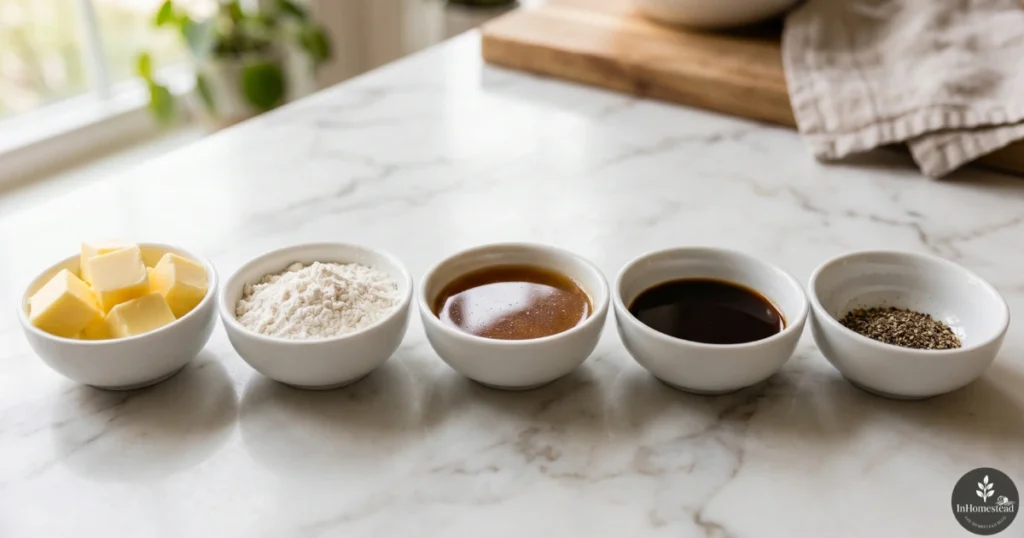
The 5 Essentials You Need
| Ingredient | Quantity | Purpose |
|---|---|---|
| Butter (or fat of choice) | 4 tbsp | Builds the roux base |
| All-purpose flour | 4 tbsp | Thickens the gravy |
| Beef broth | 2 cups | Provides the savory backbone |
| Worcestershire sauce | 1 tsp | Adds umami depth |
| Salt & black pepper | To taste | Balances and rounds flavor |
Notice the equal parts butter and flour. That’s the classic 1:1 roux ratio, and it’s what gives you a gravy that thickens evenly without tasting pasty. Stick with that ratio and you can scale the recipe up or down for any crowd.
For the broth, beef gives you that classic deep brown color and the richest flavor. If you’re using boxed broth, reach for the low-sodium version so you can season the gravy yourself. Better yet, use homemade beef stock if you have any in the freezer.
Optional Add-Ins for Extra Flavor
Once you have the basic recipe down, you can layer in extras to suit the meal you’re cooking:
- A pinch of onion powder, or a spoonful of finely chopped onion cooked until soft
- Garlic powder or one minced fresh clove
- A splash of soy sauce or coconut aminos for extra umami
- A pinch of dried thyme, rosemary, or sage for an herby Sunday-roast feel
- A teaspoon of beef bouillon paste for deeper color and saltier punch
- A small splash of red wine for a steakhouse-style upgrade
A little of each goes a long way. Start subtle, taste as you go, and remember you can always add more — but you can’t take it back out.
How to Make Homemade Brown Gravy Step by Step
Here’s the full method. Read it through once before you start so the timing makes sense.
- Melt the fat. Place a saucepan on the stove over medium heat, then drop in the butter. Let it melt completely, but pull it before it starts to brown. You want golden and bubbly, not toasted.
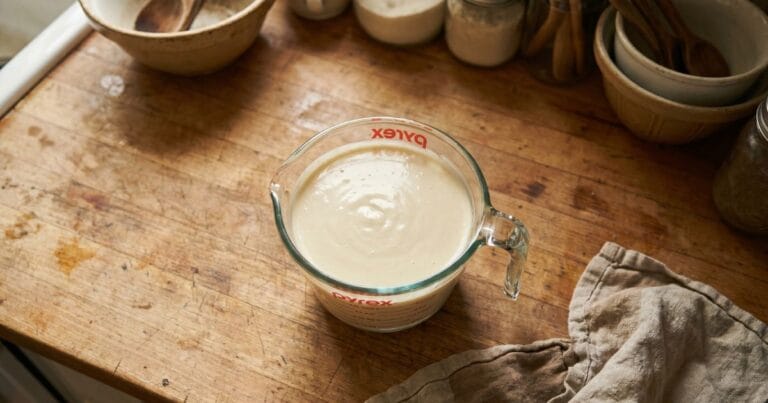
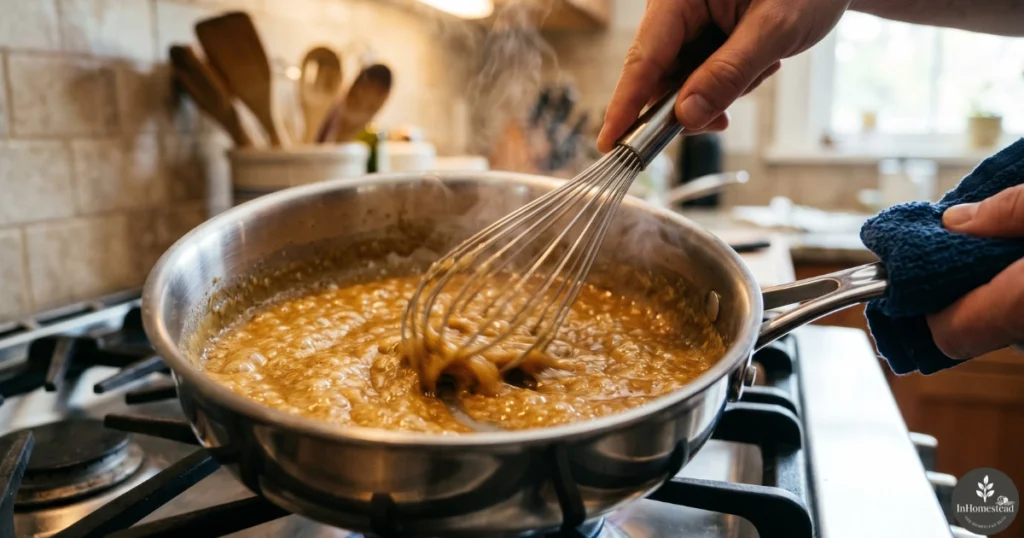
- Make the roux. Sprinkle in the flour and start whisking immediately. Whisk steadily for another 2 to 3 minutes until the mixture takes on a pale gold hue and gives off a warm, nutty aroma. This step is what separates real gravy from glorified flour-water.
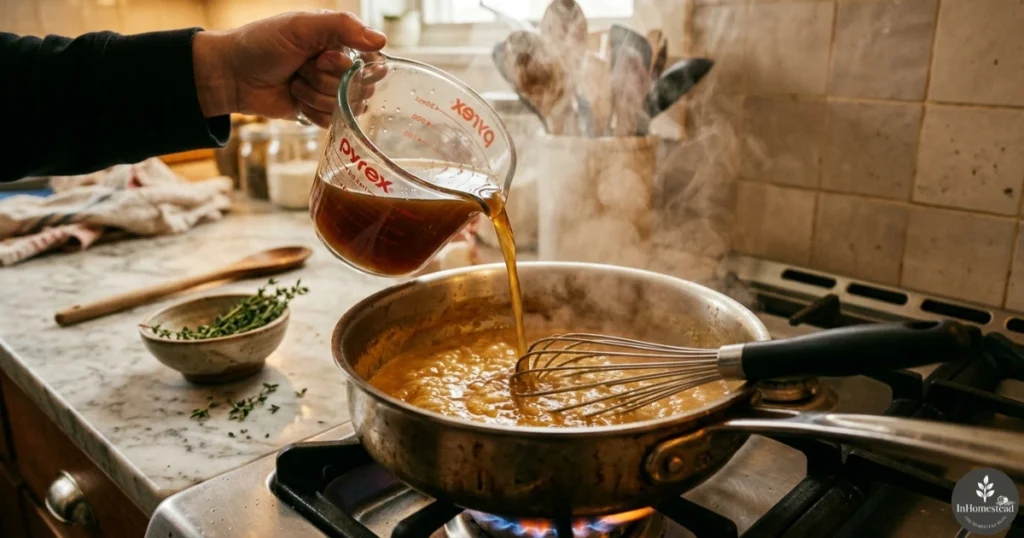
- Add the broth slowly. Pour in about a quarter of the beef broth while whisking constantly. It’ll seize up and look weird for a second — that’s normal. Keep whisking until smooth, then add the next portion. Repeat until all the broth is in.
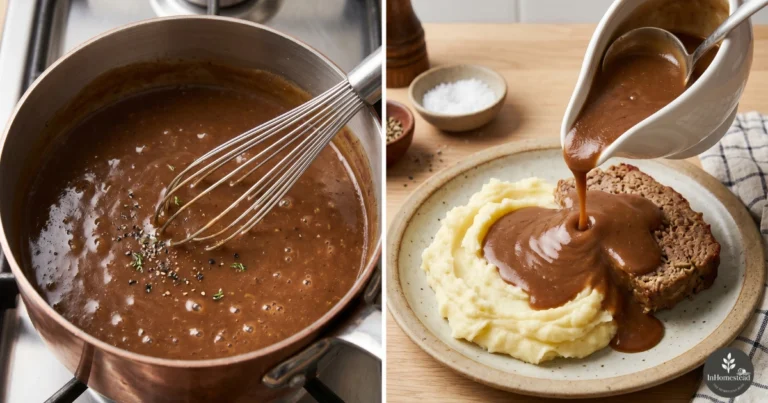
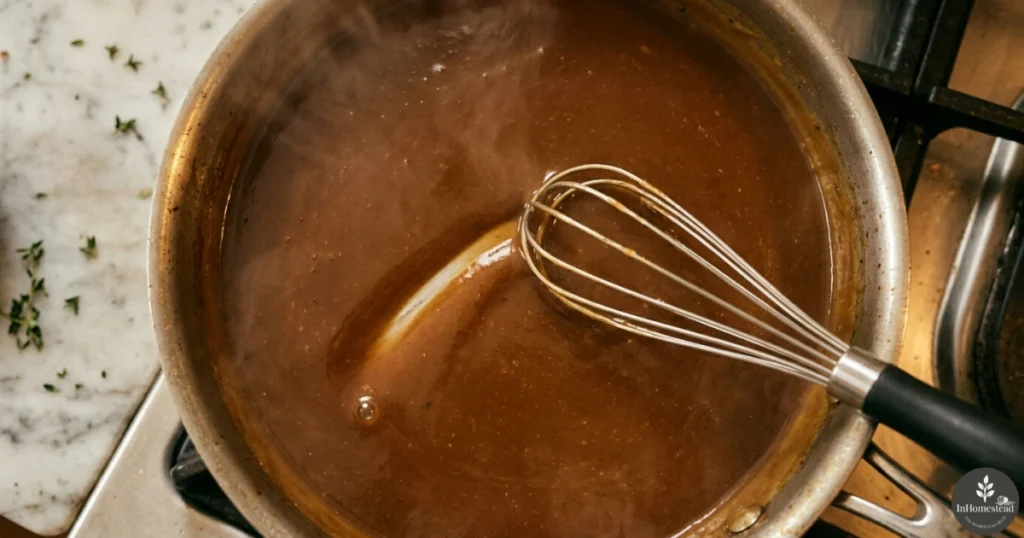
- Simmer and thicken. Let the gravy come to a gentle bubble and cook for 3 to 5 minutes, whisking often. You’ll see it thicken visibly. It’s ready when it coats the back of a spoon and a finger swiped through the coating leaves a clear line.
- Season and adjust. Stir in the Worcestershire sauce, then salt and pepper to taste. This is the moment to also add any optional flavorings you want — herbs, garlic, a splash of soy.
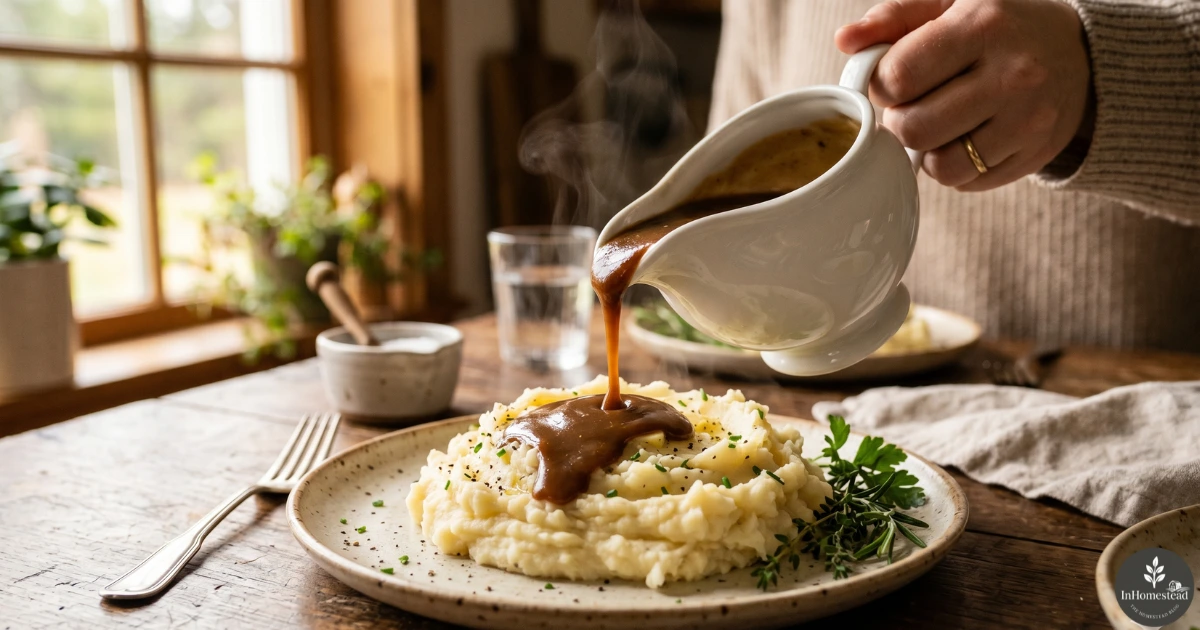
- Serve hot. Gravy thickens as it cools, so pour it over the food while it’s still glossy and pourable. If it sits too long and stiffens up, just whisk in a splash of warm broth to loosen it.
That’s the whole method. Once you’ve done it twice, you won’t need to look at the steps again.
Pro Tips for Perfect Homemade Brown Gravy Every Time
These small details are what separate a good batch from a great one:
- Whisk constantly when adding broth. This is the single most important rule for lump-free gravy. The roux needs continuous motion to absorb liquid evenly.
- Warm the broth first. Cold broth hitting hot roux causes flour to seize up and clump. Even a quick 30 seconds in the microwave makes a noticeable difference.
- Don’t rush the roux. Undercooked flour tastes raw and chalky. Two to three minutes of whisking lets the flour toast and develop flavor.
- Adjust thickness easily. Too thick? Whisk in more broth a tablespoon at a time. Too thin? Let it simmer another minute or two and it’ll tighten right up.
- Color matters. For a deeper brown shade, cook the roux a minute longer until it’s the color of peanut butter, or add a dash of soy sauce or Kitchen Bouquet at the end.
- Strain if needed. If a few lumps slip through despite your best whisking, pour the gravy through a fine mesh strainer into a serving boat. Nobody will ever know.
Common Mistakes to Avoid
Most gravy disasters come from one of these missteps:
- Adding cold broth all at once. Pouring two cups of cold liquid into hot roux is the fastest way to get lumpy gravy. Always add it gradually and whisk between pours.
- Skipping the roux step. Some shortcuts have you stir flour directly into broth. The result is thin, raw-tasting gravy with that unmistakable floury aftertaste. The roux is non-negotiable.
- Over-salting too early. Beef broth and Worcestershire already carry plenty of sodium. Always taste before reaching for the salt — you may not need much, if any.
- Using high heat. Roux and gravy are medium-heat operations. Cranking the flame burns the flour, scorches the milk solids in the butter, and turns your gravy bitter.
- Walking away. Gravy needs your attention for those 10 minutes. It rewards consistent whisking and punishes neglect.
Variations to Try
Once the base recipe is muscle memory, branch out. These variations all use the same technique with simple swaps:
Drippings-Based Brown Gravy
If you’ve just roasted a chicken, beef, or pork, don’t pour those drippings down the drain. Tip them into a measuring cup, skim off most (but not all) of the fat, and use 4 tablespoons of the fat in place of butter. The flavor is incredible — this is the gravy your grandmother was making.
Gluten-Free Homemade Brown Gravy
Skip the flour roux. Instead, whisk 1 tablespoon of cornstarch or arrowroot powder with 2 tablespoons of cold broth until smooth, then whisk that slurry into simmering seasoned broth. It thickens almost instantly and stays clear and glossy. Use about half the thickener you’d use for flour.
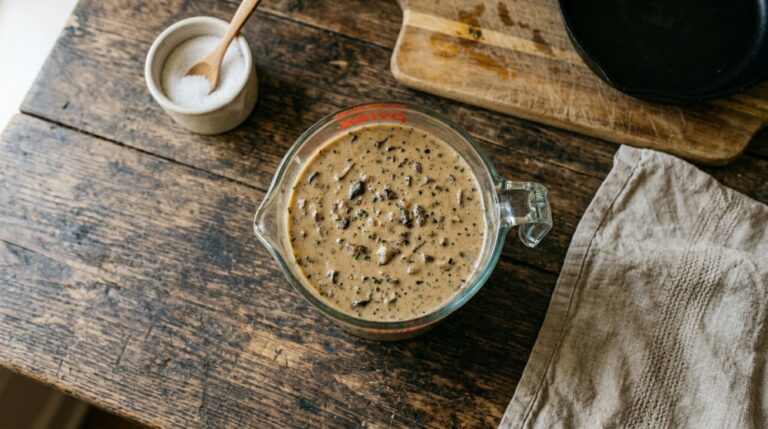
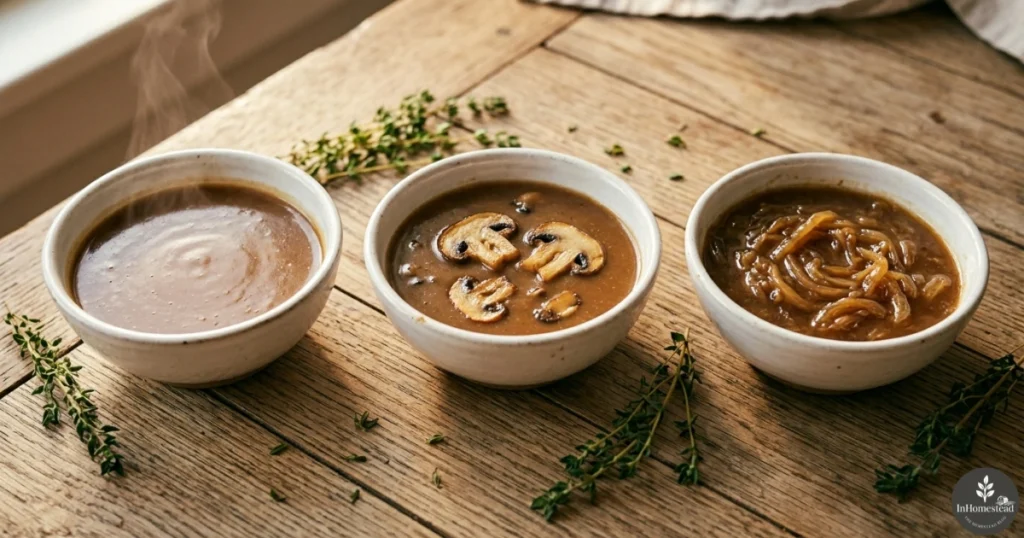
Mushroom Brown Gravy
Slice 8 ounces of cremini or button mushrooms thin. Sauté them in the butter for 5 to 7 minutes until they’re deeply browned and have released their liquid, then sprinkle in the flour and continue with the recipe. The result is earthy, hearty, and incredible over Salisbury steak or pork chops.
Onion Brown Gravy
Slice one yellow onion thin and caramelize it slowly in the butter for 15 to 20 minutes before adding the flour. Yes, it takes longer, but the sweet-savory depth this adds turns ordinary gravy into something restaurant-worthy. Perfect over meatloaf or open-faced roast beef sandwiches.
How to Store and Reheat Homemade Brown Gravy
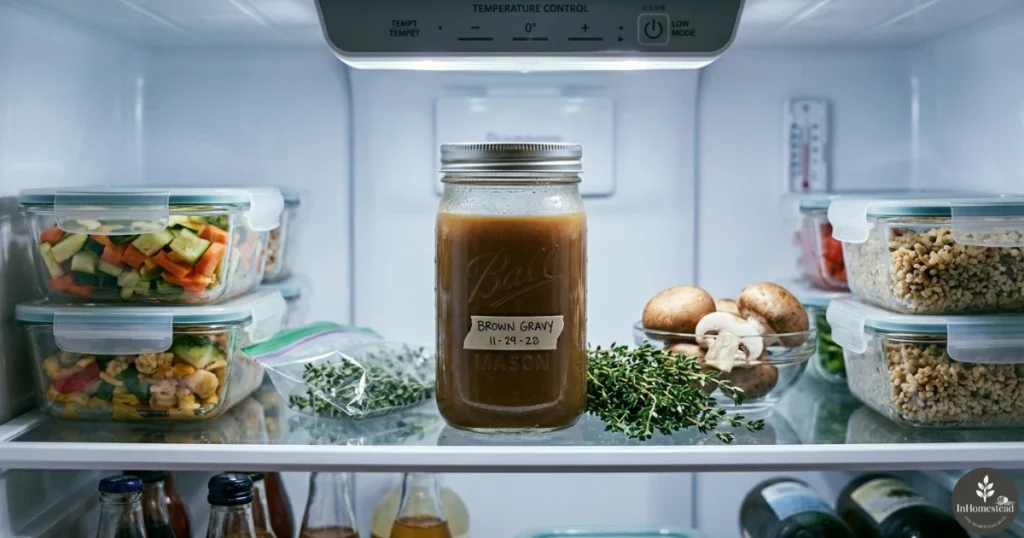
Gravy stores beautifully, which makes it a great make-ahead component for busy weeks or holiday meals.
- Refrigerator: Pour cooled gravy into an airtight container and refrigerate for up to 4 days.
- Freezer: Lay it flat in a zip-top freezer bag, squeeze out the air, and freeze for up to 3 months. Thaw overnight in the fridge before reheating.
- Reheat: Warm gently on the stovetop over low to medium heat, whisking constantly. Add a splash of broth or water to bring it back to its original consistency — it’ll thicken in storage and need a little loosening up.
Avoid microwaving on high power, which can break the emulsion and leave you with a separated, oily mess. Low and slow is the rule.
What to Serve with Homemade Brown Gravy
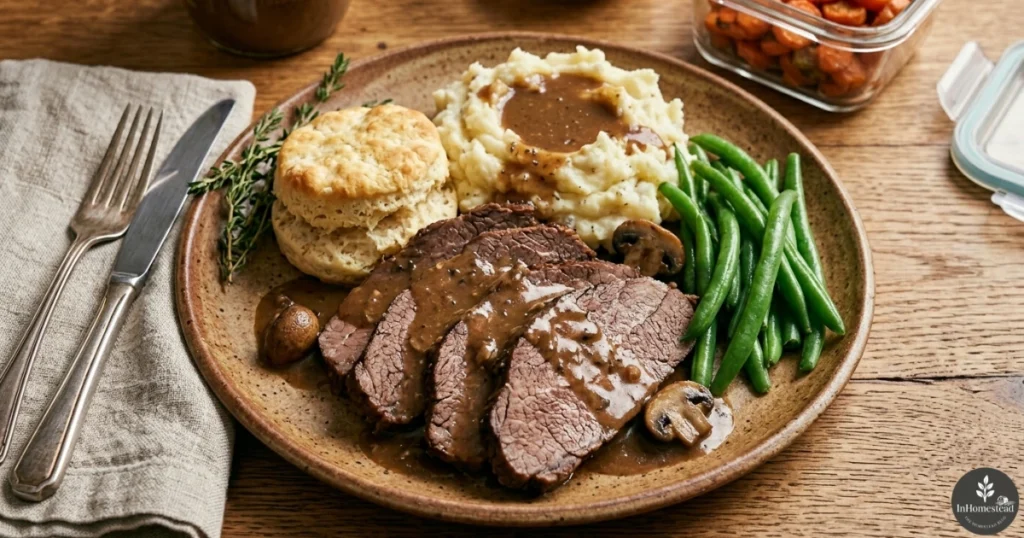
The honest answer is: just about anything savory. But here are the classics that homemade brown gravy was practically invented for:
- Mashed potatoes (the obvious king)
- Roast beef, pot roast, or meatloaf
- Buttermilk biscuits, especially with breakfast sausage
- Salisbury steak
- Hot turkey or roast beef sandwiches piled on white bread
- Rice and stuffing
- Poutine — crispy fries, fresh cheese curds, hot gravy ladled over the top
- Meatballs or country-fried steak
- Yorkshire puddings
Once you have a quart of gravy in your fridge, you’ll find new uses for it all week.
Conclusion: A Skill That Pays You Back Forever
Homemade brown gravy is one of those small kitchen wins that changes how you cook. Five pantry ingredients. Fifteen minutes. A skill you can pull out for a Tuesday weeknight dinner or a Thanksgiving table without breaking a sweat. No more salt-bomb packets, no more jarred mystery sauce, no more skipping gravy because you didn’t roast a turkey.
Make it once and you’ll wonder why you ever bought it premade.
Ready to bring more from-scratch cooking into your kitchen? Subscribe to InHomestead for weekly recipes, homestead skills, and our free Pantry Staples Cheat Sheet — everything you need to cook real food from real ingredients without overthinking it.
FAQ – Homemade Brown Gravy
Can I make homemade brown gravy without drippings?
Yes — this entire guide is built around that method. Butter and good beef broth give you all the richness you need, no roast required. Drippings add wonderful complexity when you have them, but they’re never a requirement.
Why is my homemade brown gravy lumpy?
Lumps happen when flour hits liquid that’s too cold, when broth is added too fast, or when the roux gets ahead of you. Warm your broth first, add it slowly in stages, and whisk constantly between pours. If lumps still sneak in, pour the finished gravy through a fine mesh strainer to smooth it out.
How do I make homemade brown gravy thicker?
You have two easy options. First, simmer it longer — gravy thickens as moisture evaporates. Second, whisk in a small cornstarch slurry (1 teaspoon cornstarch mixed with 1 tablespoon cold water), then cook for another minute or two until it tightens up.
Can I make homemade brown gravy ahead of time?
Absolutely. Make it up to 4 days in advance, refrigerate in an airtight container, and reheat gently on the stovetop. Whisk in a splash of broth to bring it back to the right pourable consistency. It also freezes well for up to 3 months.
What’s the best broth for homemade brown gravy?
Beef broth gives you the deepest, most classic flavor and that signature brown color. Choose a quality low-sodium version so you control the salt, or use homemade stock if you keep it on hand. In a pinch, beef bouillon paste mixed with hot water works surprisingly well — just go light on added salt.